Showing posts with label wall display. Show all posts

Thursday, January 9, 2014

Dining Room Conversion: Part One

Brent and I love to entertain at our house. We often have people over for dinners, bbqs, yard games, game nights and more. We had a need for a larger dining room, but didn't have the money to tear out walls. So one day I told Brent my plan and he thought I was a little crazy...

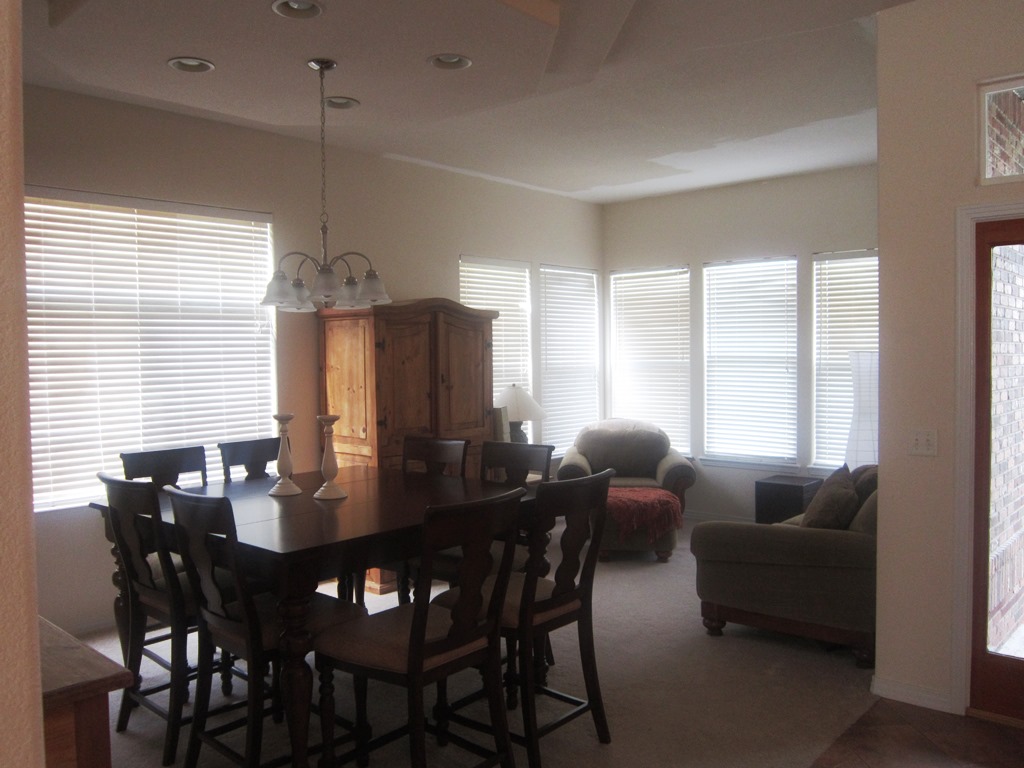
(Just for a reminder here are two pics of how the front room and dining room were set up)


My crazy plan...Convert the small-ish dining room into a sitting room/wine lounge. To do this, I moved the small loveseat from the front room under the wall of wine art. I also pulled in a small white coffee table, two side tables and two wonderful chairs I'd found a couple years ago at a flea market. I left the bar and hutch in the room.


I love the result! And since we've had the room arranged this way, people have already been sitting on the furniture. When those pieces were in the front room, they were NEVER used.

The room is cozy and comfortable now. It also feels more appropriate for the square footage in the room.


And it's just off the kitchen, so guest can sit in there and enjoy a glass of wine while I'm finishing up meal preparations.


Someday...in my dreams, I'd really love to make that window a set of french doors that open out onto a larger deck in the back yard. It would create really nice flow in and out of the house to the yard. Even better for hosting large gatherings.

For now, we'll enjoy this new lounging area.

And soon, I'll share what we did with our dining table, because I'm sure you're wondering where we're eating our meals now. :)

Karli

Saturday, September 7, 2013

The McOlson House: Making It Their Own

Meet Marie.

I was honored to have Marie as a beautiful bridesmaid during my wedding

I met her our freshman year of college. We were on the same floor in the dorms and soon decided we'd like to share off-campus housing once we were allowed to move out. We lived together for two years, in a tiny apartment and a rented single family house, so I had a pretty good idea about her style. She's one of those friends that you can pick right back up with, even if it's been months since you last talked.   

Marie and her husband Travis recently bought a house. She asked me to come over and give them some ideas on paint colors, layout, finishing touches, etc. I jumped at the chance! I spent a morning with the two of them, talking about pieces of furniture they had to keep, what we could change, what they like and don't like. Then I took pictures and measurements and started planning with mom. We did a lot of our brainstorming via a secret board on Pinterest. (Have you tried that? It's amazing!)

So here are the before photos of the space. Their biggest concern was the paint. The pale yellow is so not them. They want to add color, but aren't sure where or how much. So my goal is to add punches of color within a neutral palate.

As you walk in the front door, this room is on your right. It's a dining room/formal sitting room. You can see that they started to paint the ceiling white, but it made the yellow-ish paint look worse. So right now that's on hold until we pick a paint color.
 
This is the couch (with a matching chair) in the front room. We'll work with this, just switching up the placement and pillows.
 
This is the dining room view. The table is cocktail height. The light fixture is change-able as well.
 
The next room you walk into is the open, spacious kitchen. The granite color is great. They don't love the tile floor or backsplash, so I'll come up with some ideas for that as well.
 
From the kitchen you can see into the family room, where they spend the majority of their time. We'll work with all the furniture in here. Paint, window treatments and some punches of color will finish this off nicely.
 
This is a piece of art Marie recently bought. I am actually using it as my inspiration for the pops of color I'll use in the entire space. I'm thinking of hanging it on a wall you see right when you walk in--a point of view where you can see all the rooms. It will all make sense from that vantage point.
 

Mom and I were putting finishing touches on our design boards this weekend. I'll present them to Marie and Travis and get their feedback so we can make any adjustments before they're considered final.

This is SO fun!

Stay tuned for more,
Karli

Thursday, August 29, 2013

Change Your Wall Display: Empty Frames and Keepsakes

The truth is.....I love to rearrange and redecorate! I really miss that aspect of running the Antique Store. To me, constantly changing out the windows and displays was my idea of "fun". In my own home, though, I think sometimes I get a little lazy. It is time to change that and past time to freshen some areas.

Since the Master Bedroom is still a work in progress, I like to confuse myself by moving to another area for a different project. I moved into what I refer to as the "Daybed Room."

This room is very monochromatic, all whites, creams and khaki. It is dedicated to vintage décor, and oh yes, it does contain a daybed. 

Here is the area over that daybed.  It has looked like this for several years and it is hard to dust the stuff on the shelf. That is the problem with shelves over beds.
Before
During...get it all out of sight while you start over.

After Here's the new wall display.

 A close-up of Cousin Jessie from the late 1800's.

A framed collection of vintage lace dress collars and old door knob back plates.

The large frame came from an estate sale. I love what's left of the chippy paint.
You can easily see how much I love old frames. I do have quite a collection of them. And the fact is, I have quite a lot of stuff! I can take a walk out to my shop and bring in a whole new assortment to use on any display. I realize that many of you do not have antique store inventory in a shed out back. But, you can still get a new look by just changing out what you have. Take something down, move it to another part of your home. Don't be afraid to put a hole in the wall. You can easily patch and repaint if you change your mind. Just do it!
The before again...

And the after!

Making small changes like this project make me take a second look at a room that I have perhaps ignored for a while. As I walk past, I actually look in. My husband even noticed and said, "I like what you did on the wall."  That is a huge comment for him.

I'll be moving on to other parts of this room next week.

Happy Changing,
Kandy

Friday, May 24, 2013

Displaying Found Junk On A Patio Wall

You may remember in an earlier post the damage that was done to the roof of our garden shed when Dwight and I took down part of an aspen tree......well the weather has now improved so we decided to repair the damage that we caused.  We replaced a board and the roof shingles.  Fixing all of that meant that we needed to get to the inside walls of the shed, locating nails.  Needless to say, we found it necessary to empty the shed to get to those walls.

As we sorted through 30 years of stuff, I found some "junk" I had forgotten that I had.
It is all "family stuff" that I had hauled back from Oklahoma, knowing some day I would find a place for it.  Here is the saved stuff we uncovered in the shed.....

These are old cistern cups, used to bring water up out of a cistern or well. These were my Grandpa Ray's and had been used on the farm in Okla.
 
A rusty old saw blade and a gear.
                                     
These are a pair of rusty old hames, part of a harness which would have been used with horse drawn farm implements. These were Grandpa's too.
           
This is an old drawer front I found who knows where....... You can not see it but it has the letter "F" stamped on the front.
It will be great to hang BBQ stuff off of the handles, or not!!!

I hung all of this assorted "found junk" on the wall outside on the deck.  I already had the grapevine wreath hanging there, so I just incorporated it all for a unique display.
I bet I can truly say that no one else has a wall quite like ours!
           
I would love to add a pillow to the chair, but the squirrels have been known to destroy things on our deck.  I also need to re-stain the deck later when it gets a little warmer, but decorating this wall inspired me to look forward to spending time out here this summer. 

I want to try planting in the cistern cups, too......I think they would be great for succulent plants, like hens and chicks.  I have one more set of these that I'm saving for Karli.....she might want to do the same thing.  If nothing else, they are great conversation pieces!  Did you know what they were?

Happy Deck Time, Kandy