Showing posts with label burlap flowers. Show all posts

Thursday, May 2, 2013

A Spring Antique Sale

As some of you may recall, in my former life, I was an Antique Dealer. When the store closed I took my inventory home. I have had one big sale here at home, but, for the most part, I have just been sitting on all that stuff.
I keep my "stuff" in my barn, where I have a showroom set up.

I did a show last weekend, a money-maker for a ladies organization raising funds to offer scholarships. I paid for an 8' space, set up my booth area, sold my antiques and vintage items, and then I donated 10% of my proceeds to the ladies club. It was for a good cause and a fun outing since I haven't been playing with "my antique stuff" for quite a while.

A good friend of mine, who is also an antique dealer, joined me in the venture. She brought her items to add to mine. Then another friend, also a dealer, gave us some of her items to sell as well. It was a joint effort!

We started setting up by creating walls with two sets of shutters.
Love using these to divide areas as well as hanging on.
  
The "girly" side of our booth was the perfect spot for hats and frilly feminine items just right for Mother's Day giftgiving.
Love the black and white

 This is a close-up of an old cabinet door. I painted the center with Chalkboard paint and added vintage hooks.
                        
 A broader view of the "girly" black and white side. You may recognize the chair from an earlier post.
           
The old metal display unit is perfect for hankies and gloves. I used this at the store for several years and people always wanted to buy it.
This metal rack was originally used for candy in General Stores.
You can see more white ironstone on this earlier post.

A closer look at one shelf. We even sold some of the burlap flower magnets. See our post on how to make these.
               
This part of our booth was dedicated to vintage gardening.
A potty chair from the 1950's holds a potted rose plant.
             
Layering on top of the enamel top table with an old wood box allows for more garden items.
Love the pink and green for Spring!
                              
The garden items even filled the floor.
                
It is still early for "real" plants in our area, however the silk ones made everyone think of Spring.
The little potted flowers were just too sweet!
                    
 The little watercan holds my business cards.
              
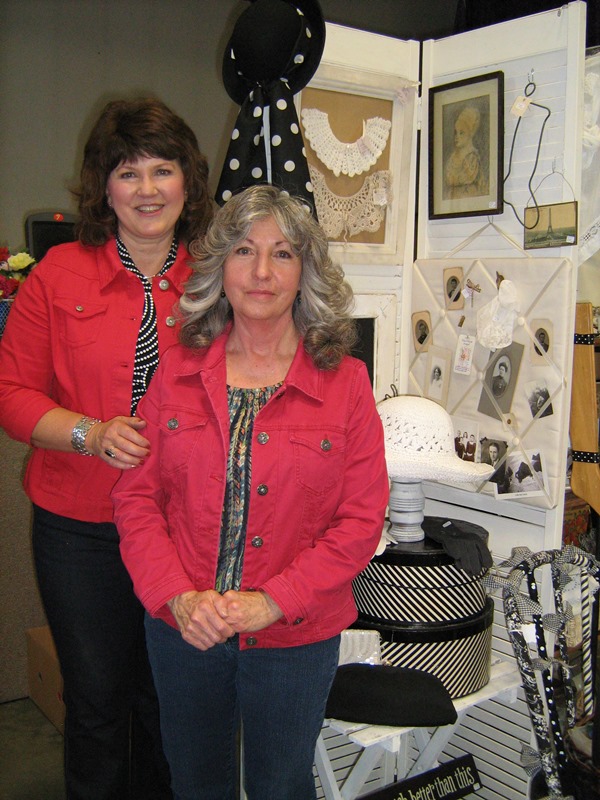
Would you believe we did not plan to wear similar jackets!
             
The sale was not quite the sucessful day of selling that we were anticipating, but we did have fun planning, hauling, setting up, visiting with customers, tearing down, boxing our stuff back up, and then hauling it all back home. (Really!!!)

That is the way it goes sometimes!     CARRY ON!!!

Happy Spring,
Kandy

Tuesday, April 9, 2013

Kindred Style Duo Hosts a Tea Table

I promised I would report on the tea table that Karli and I hosted at her Church this last weekend. So this is me "making good" on all my promises!

Here we are all ready to go to the Tea.
Karli's yard wasn't "blooming" yet, but it was a beautiful day!


The Tea was a lovely afternoon event with delicious food, wonderful entertainment, and more than 120 ladies in attendance. Each of the tables was decorated in a creative way. Karli and I had fun making ours a little "organic" with the use of all the burlap.


A few shots of our table
We had a white cloth covering the large round table. To that we added a square topper of burlap, with a cream vintage linen cutwork cloth in the very center. We used a large ironstone pitcher from the late 1800's filled with fresh white hydrangeas as our centerpiece. We then scattered several of the burlap flowers I had made. To see how these are made, check out the earlier post.

A close up of the burlap flowers
We used Karl's white dishes, cup and saucers, and white teapots. We added three small pots of green herbs. This touch of green tied in nicely with the green leaves of the hydrangeas. These tiny nests added even more "natural spring" flavor to our table.
The precious little nests with birds and eggs--very spring-like!

Everyone loved the bow details we added to the folding chairs.
 
We tied "recycled" laced (from an old curtain panel) and burlap bows

Even the napkin holders were burlap flowers glued onto burlap ribbon.
The napkins were paper, doily like.

Our table was #7 so I had painted a small frame white, distressed it and covered the inside with what else....burlap. I glued on a small black paper clip to hold our number.

The frame can hold a picture or special postcard later
Karli and I had such a good time planning and hosting our tea table, I am sure we would love to do it again next year. 


Right now I am making plans to "reuse" all those burlap flowers.

Happy Spring,
Kandy (and Karli too) 

Saturday, March 30, 2013

Getting Crafty with Burlap Flowers

Karli and I are going to decorate/host a tea table for a function her church is having. We brainstormed how we wanted our table to look (color, texture, theme, etc.) and we loved the idea of using burlap and getting crafty. It seems only fitting that our Spring Tea Table should include flowers. 

So, we bought several yards of the natural color burlap and then I checked out different blogs and sites for flower making advice. I found some wonderful ideas and instructions, but after trying several methods, I ended up doing my own thing! 

Let's get started making "Kandy's Burlap Flowers":
Here is what you will need:  burlap, scissors, sewing machine, glue gun, cardboard circles (cut 2" diameter for small or 2 3/4" diameter for large), an old magazine (for gluing on top of...tear off page when gets messy), the lid of a spray paint can (works well to glue on, turns easily), clothespin (and anything else you see in the photos that I failed to mention). 

Here are the steps:
1. Cut fabric into strips 2" wide 44" long (the width of the fabric). 
Tip:   Pull a thread just beyond 2", then cut along this line. This helps your fabric stay square and straight.
          

2. Cut this strip in half (22") for a small flower or leave the full 44" length for a large flower.

3. Fold the strip in half lengthwise and sew along the two edges.
              

4. Fold one end over and use the glue gun to glue it in place. 
Tip:  Use a clothespin to hold it in place while it dries. This end will become the center of your flower

 
5. Pull one thread (from the other end) and start gathering or ruffling up the fabric. 
Tip:  Pick a thread above your line of stitching. Don't pull it completely out. Your clothespin and glued end should hold it.
 

6. While keeping tension on that thread and keeping your fabric ruffled up, fold the remaining end under and glue it. 
Tip:  This is going to become the bottom of your flower.


7. Now glue that edge onto the outside edge of your cardboard circle. Your cardboard circle should be sitting on your spray paint can lid. You can take the clothespin off of the other end. It should be secure by now.


8. Continue gluing that ruffle onto the circle, turning as you go, working your way inside your flower. (Be careful not to burn yourself.) You can cut off the end of the thread that you gathered with. You may also need to trim some threads as you work...burlap frays out easily.
 

9. Continue gluing, forming the center of the flower with the very end of the fabric. This should look somewhat like a flower by now.


10. Carefully hold the very center for a while till the glue has all set up.


If all went well, you should have a flower that looks like this or similar!


If this hasn't been enough steps for you, we can keep going.....

You can cut a circle of burlap, the same size as your cardboard and cover the underneath side of your flower (just so it looks nice on the bottom).

You can also glue on a magnet or whatever else your little heart desires (like a clothespin or brooch pin or hairclip), depending on what you plan to do with "your" flower.

Karli and I are using our flowers on napkin rings and for table decor. We'll be sure to take pictures and make a post about our tea table.  I bet you can hardly wait to see it!!!

Later, Kandy