As I've mentioned numerous times, our home was built in 1970. When we moved in, I vowed I would be changing all of the ceilings that had the popcorn acoustic texture on them. We have lived here for almost 33 years and I just finished knocking off the last one.
Because I want you to share my agony in doing it and my joy in having it done, I am going to share my experience with you.
Here is what I started with. I really don't know where the term popcorn came from. It actually looks like "large curd cottage cheese" to me. It is awful.....whatever it is. It is impossible to keep clean. Cobwebs get stuck in it. If you ever let a pecan pie boil over in your oven and the house gets smokey.....it goes to your ceiling to live.
Here is the last one in our home. It is located in what we call the den--where the desk and computer reside. This room is right off of our front door and entry hall. What an awful way to greet guests.......
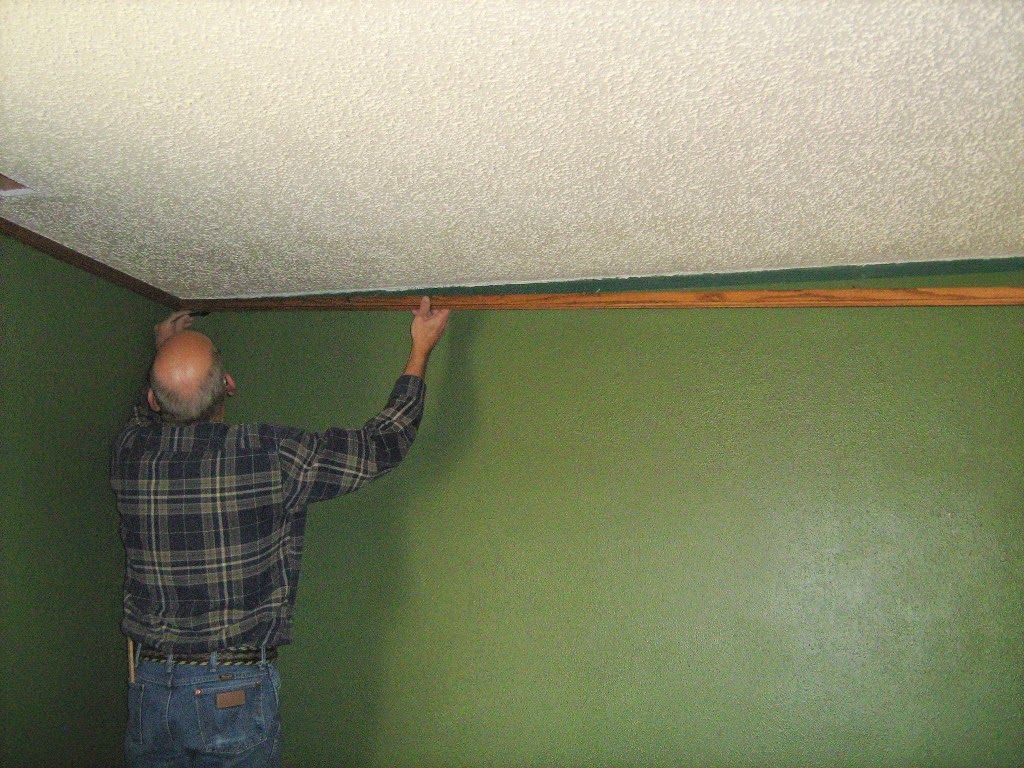
First, the oak trim came down with hubby's help. Notice the old hunter green wall paint that is going away too.
Then I got to work...First I filled an old squirt bottle with water and squirted my work area, (while on a ladder, of course).
Then I used a putty knife to scrape the texture off. There is a knack to this. You don't want to scrape so deep that you go all the way to the sheet rock. If you do that, your ceiling will require first a skim coat and then a coat of new texture. I wanted to leave some of the texture there, just not the heavy "cottage cheese."
Here is a lovely shot of me doing the job. Glasses or goggles keep the stuff from falling in your eyes and a mask is in order. If you are like me and still have hot flashes, your glasses will continue to fog up. And, did I mention how bad your neck and shoulders will hurt from continually working over your head. I am sooooo glad I do not do this for a living.
That is what I looked like and this is what the floor looked like. I was getting new carpet so I just let it fall on the old carpet. In previous rooms, I've held a trash can to catch the stuff, but not this time!
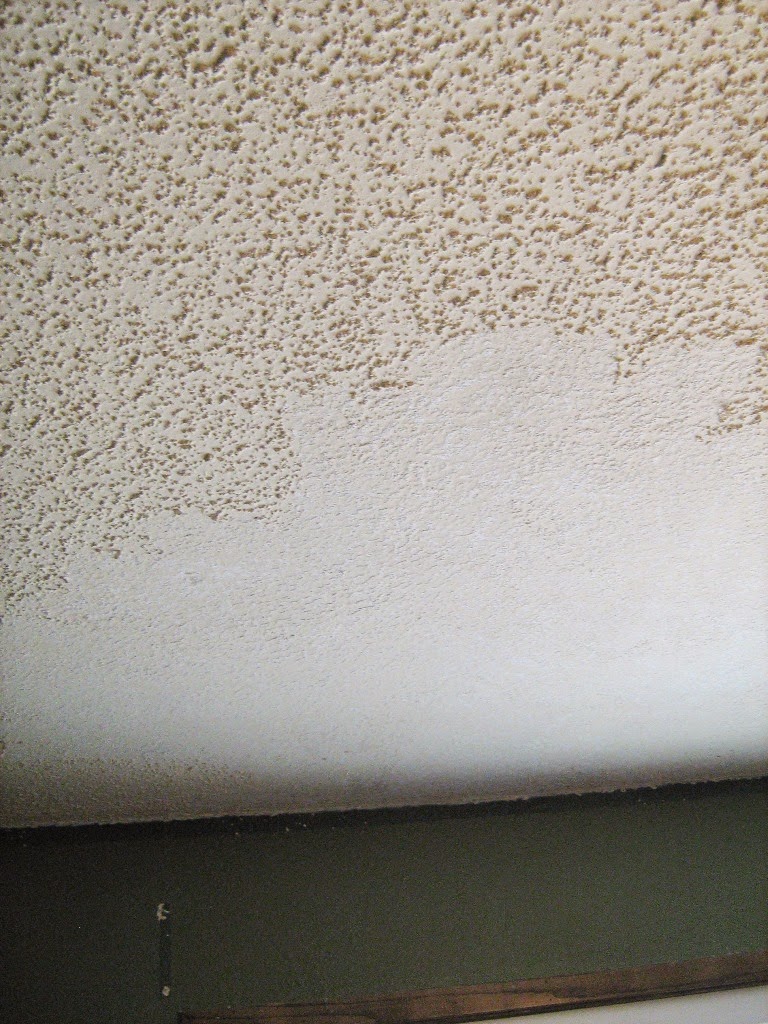
Here is what progress looked like......
I had to mist and scrape, vacuum down, then damp mop, yes mop the ceiling. The dust just kept coming. After all of that, I primed the entire ceiling with Zinsser Primer. This stops the dust from falling and gives the new texture or spackle something to stick to.
Then I began putting a spray texture on in a random pattern. I had been assured that the can of spray texture that I bought was new and improved, but low and behold when I was 3/4 done, it clogged and refused to spit forth any more texture. I was left to my own devises with a can of spackle. I did my best to give the ceiling a random, what I call, a "knocked down," unexpected look. After that, I again took my putty knife and scraped all over lightly. I did not want to have any little "hangy down balls"....
When I was as happy as I could be with my texture job. I again vacuumed the ceiling and then painted the ceiling with two coats of flat white paint. The flat paint hides a lot of imperfections. Then I painted the hunter green walls with two coats of Sherwin Williams Tavern Taupe, which I love. Here is a picture of the progress.
The new carpet arrives this week so I will finish giving this room a fresh new look and let you get a peek later.
Oh, and while I was working in this room, I left hubby unattended and he started tearing out the floor in the utility room and downstairs bathroom..........Oh My!!!
Kandy
Saturday, February 21, 2015
Wednesday, February 18, 2015
Another Closet Door Story
It has been quite some time since I decided I was making over all of the bi-fold closet doors in our home. You can check out my first closet door makeover here (our most popular post to date!). Those got black paint and now this project gets just the opposite.....white. I'll give you the steps just in case you ever want to give yours a new look.
The ugly bi-fold doors came down and were sanded. They had been stained like all of the woodwork in the house.
The plan for trim was made and pieces were cut.
I glued the trim on with Liquid Nails adhesive. I like using it better than wood glue on these old 1970's hollow-core bi-fold doors. It seems to stick quicker.
We clamped the trim pieces in place while they were drying.
We kept checking for square.....important.
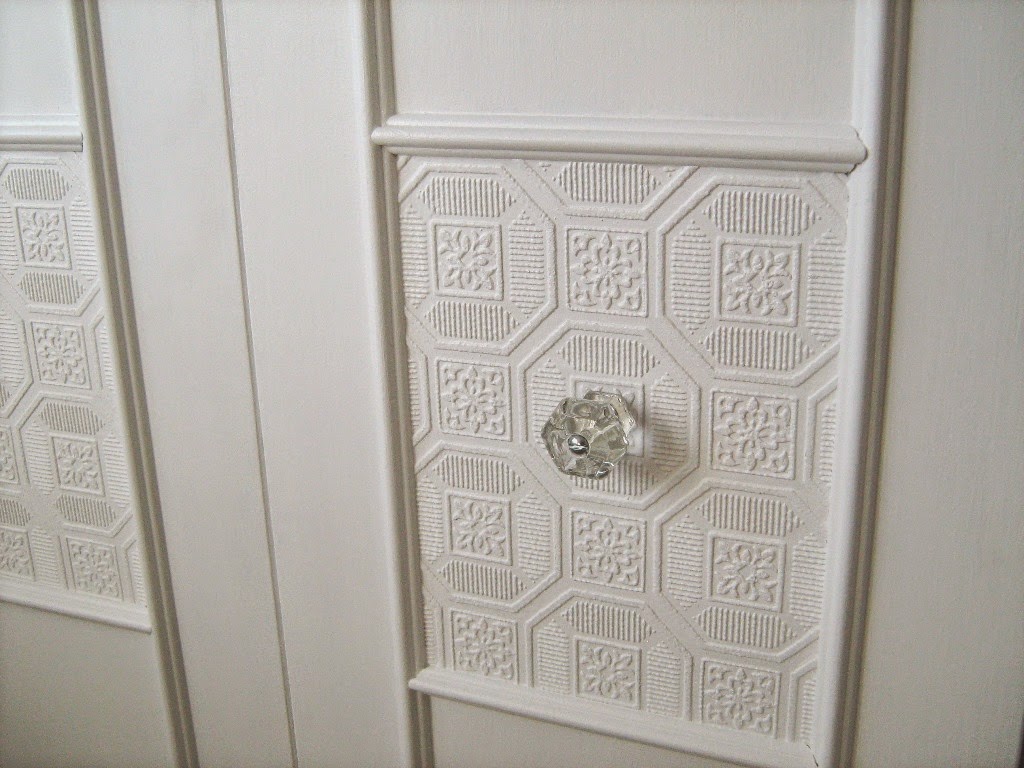
I decided to use wallpaper (that matched my border in the room) on the center section of my doors. The wallpaper was cut using a square as well. I glued it on with Wallpaper adhesive.
Here is one door with all the trim and wallpaper is place
Next the entire door was primed with Zinsser Primer. This was followed with two coats of Sherman Williams, Extra White in a Satin Finish.
The finished closet doors:
The glass knobs are vintage finds that go so perfectly in this room.
You can see the matching wallpaper near the ceiling in this picture. Finally (because it took me a while to get this finished)............Another successful closet door makeover.
Kandy
Saturday, February 14, 2015
Stitch Fix #9
I signed up for another Stitch Fix for February. My last box was great, but I didn't get to keep as many of the items as I wanted. So I thought I'd give it another whirl right away.
This was my best box yet! My stylist, Kia, called it "gold" because she said she had fun putting it together for me.
One of the best tips I have for you if you're thinking about getting a box, make sure to pin items you really want on Pinterest and change the caption to explain what you love about the item you're pinning. Then don't forget to leave a note in your request about your Pinterest board. Kia picked so much of what I'd pinned.
So let's take a look at what I got this month! The theme for this box is...Don't Knock It Til You Try It.
My first item is this color block hoodie. When I pulled it out of the box I was underwhelmed to say the least. But like most Stitch Fix items, once I tried it on, I was really happy with the fit and the way it looks on me. I like that its a "dressier" version of a lazy-day sweatshirt. Keeping this!
The next item was this cool cargo vest. It is really hard to tell if this is navy or black. They call it navy, but sometimes it reads black. I knew I'd love this before I tried it on. What can I say, I have the thing for vests right now. I got my mom a really cool vest for Christmas and I've been kicking myself for not getting myself one too. Now I have my own. Keeping this!
Oh, no they didn't. They sent me jeans. There is no way that they could possibly pick a jean that will fit. I have enough trouble finding the right size and style on my own. I was just sure that I would be disappointed when I tried to put these on. But...they fit like a glove. Plus, I love that they are slightly distressed boyfriend jeans. I don't have any distressed jeans, so I'm keeping these. So happy!
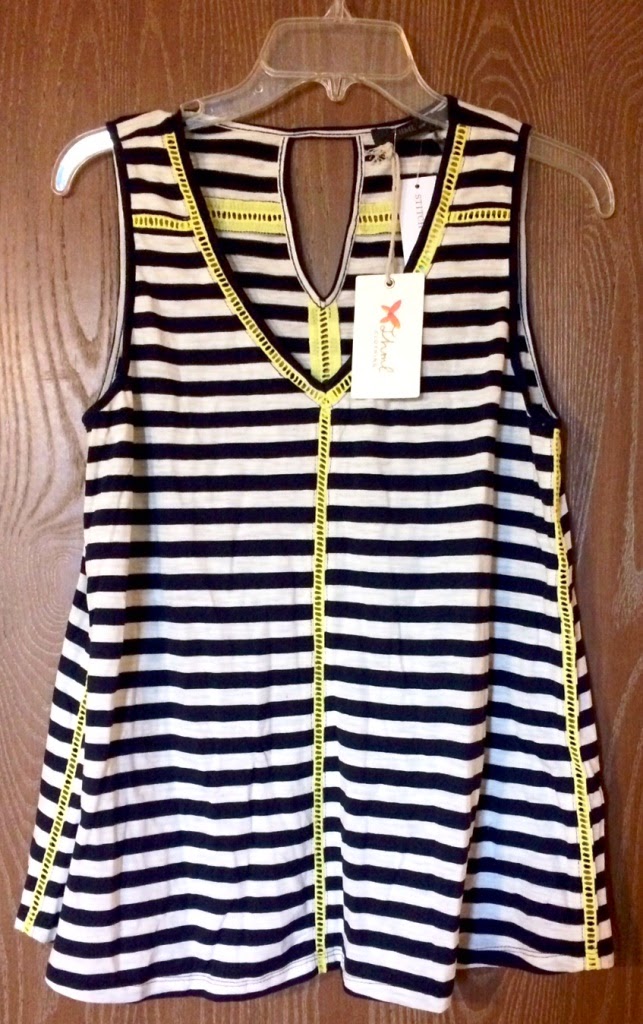
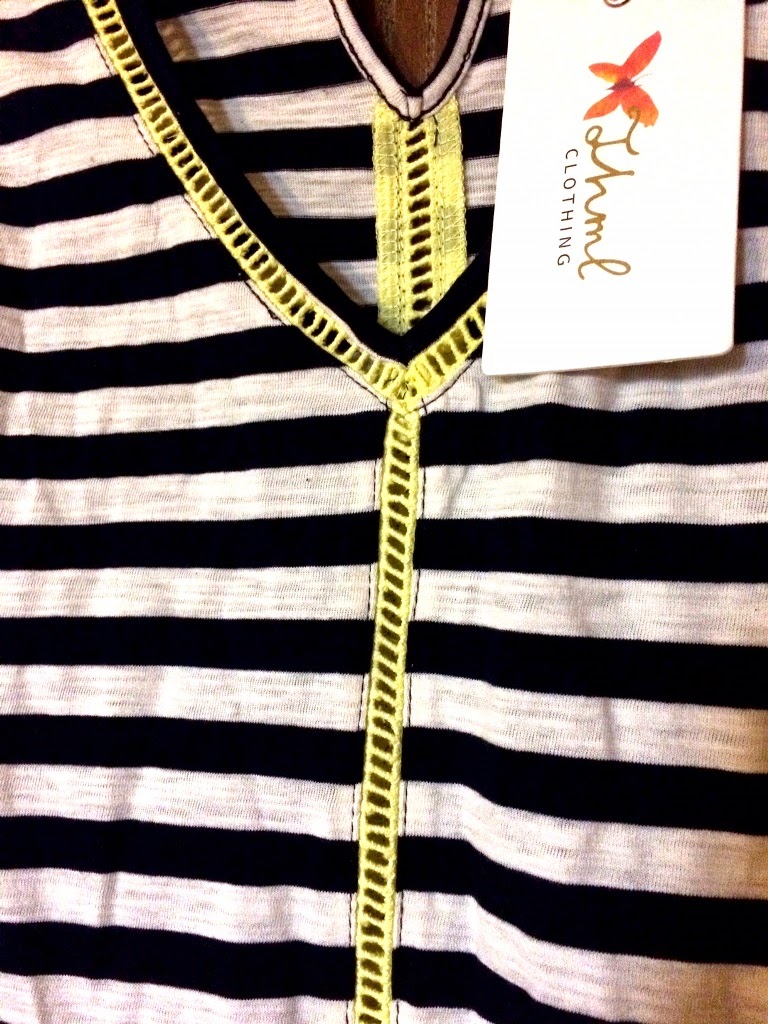
The fourth item is this cute striped tank. I was also worried that this wouldn't be flattering on or that it wouldn't fit across the bust area (my last box was wrought with that issue). But lucky me, it fits great and is really flattering. Plus I love the detailing with the yellow stitching. Keeping this!
Ahh, item number five. This was the one thing that I didn't have to try on to know it wasn't going to work. I look terrible in colors like this. I know blush is one of the hottest colors of the season, but it's just not for me. Plus the cut on the bottom of this wasn't flattering with my hips. This one is going back for sure.
So at the end of the day I am keeping four of the five items. So happy with my new pieces...especially thinking about how I'll style them with all my Stella & Dot bling. :)
If you'd like to sign up for a Stitch Fix box, just click on any of the links within.
Happy Valentine's Day to all of you. I'll be wearing something from my box out to dinner tonight.
Best,
Karli
*This post contains affiliate links. While I was not compensated to write this post, I may receive credit for sign ups. All opinions are my own and I only share what I love!
This was my best box yet! My stylist, Kia, called it "gold" because she said she had fun putting it together for me.
One of the best tips I have for you if you're thinking about getting a box, make sure to pin items you really want on Pinterest and change the caption to explain what you love about the item you're pinning. Then don't forget to leave a note in your request about your Pinterest board. Kia picked so much of what I'd pinned.
So let's take a look at what I got this month! The theme for this box is...Don't Knock It Til You Try It.
The next item was this cool cargo vest. It is really hard to tell if this is navy or black. They call it navy, but sometimes it reads black. I knew I'd love this before I tried it on. What can I say, I have the thing for vests right now. I got my mom a really cool vest for Christmas and I've been kicking myself for not getting myself one too. Now I have my own. Keeping this!
Oh, no they didn't. They sent me jeans. There is no way that they could possibly pick a jean that will fit. I have enough trouble finding the right size and style on my own. I was just sure that I would be disappointed when I tried to put these on. But...they fit like a glove. Plus, I love that they are slightly distressed boyfriend jeans. I don't have any distressed jeans, so I'm keeping these. So happy!
The fourth item is this cute striped tank. I was also worried that this wouldn't be flattering on or that it wouldn't fit across the bust area (my last box was wrought with that issue). But lucky me, it fits great and is really flattering. Plus I love the detailing with the yellow stitching. Keeping this!
Ahh, item number five. This was the one thing that I didn't have to try on to know it wasn't going to work. I look terrible in colors like this. I know blush is one of the hottest colors of the season, but it's just not for me. Plus the cut on the bottom of this wasn't flattering with my hips. This one is going back for sure.
So at the end of the day I am keeping four of the five items. So happy with my new pieces...especially thinking about how I'll style them with all my Stella & Dot bling. :)
If you'd like to sign up for a Stitch Fix box, just click on any of the links within.
Happy Valentine's Day to all of you. I'll be wearing something from my box out to dinner tonight.
Best,
Karli
*This post contains affiliate links. While I was not compensated to write this post, I may receive credit for sign ups. All opinions are my own and I only share what I love!
Sunday, February 8, 2015
Master Bathroom Renovation Update
I told you back in November about our plans to renovate our master bathroom.
Our contractor started on the project January 28th and they have made GREAT progress. It was so wonderful to see the demo stage! We had already pulled out the carpet and mirror, etc. But they got to tear down that silly wall!!
Look at the difference already! Let there be light...and SPACE.
Then it seemed to slow down a bit while they worked on rerouting plumbing, building a new wall and moving electrical. But now all that is done....
So this week they're starting all the tile work and before you know it, I'll be soaking in that slipper tub.
In the meantime I've been admiring the tile we picked and we had a blast exploring an architectural salvage warehouse where we found a special 1923 oak door from the Denver School Administration Building. It will be hung on barn door tracks as you enter the bathroom.
The process really has gone smoothly, with no major surprises. We're really happy with our contractor and the input they've provided.
The next images I show you will likely be the end result!
Karli
Subscribe to:
Comments (Atom)


