Showing posts with label upgrades. Show all posts

Monday, December 2, 2013

New Floors Finally Going In!

Two years of waiting and it's finally happening. Our main floor carpet and tile was torn out and we're getting our new "wood" floors. See the backstory here.


One week of time, lots of man hours, two bagster bags full of demo trash, thousands of staples and several sore muscles later...we had this.


Tearing out the carpet and the staples in the dining room and front room was a breeze compared to what we had ahead of us with the tile.

The layers went like this:
  1. Ceramic Tile
  2. Grout
  3. Tan brick vinyl
  4. Thin wood underlayment
  5. Thousands of tiny staples
  6. Tan vinyl
  7. Glue
  8. Thousands of tiny staples

SHOOT ME NOW!

 
Brent was not happy at this point
 
Pulling up the wood underlayment, exposing thousands of staples that we had to pull one by one

Thanks to my mom and dad for their hours of staple pulling and bathroom demo.


Porter was a huge "help"

At this point in the demo, we hosted Thanksgiving dinner. (I'm not kidding). Brent's sweet sister and her family joined us as we ate a wonderful dinner in the front room, with no furnishings and no flooring. We'll have fun memories of this Thanksgiving.


(Did I mention that we decided to tear out the powder bath too?!) We have a perfectly good cabinet and sink top if you're interested!
 
 
Empty powder bath as it stands now.

As I sit here this evening, I'm already marveling at how beautiful the new floor is looking. The installer is the nicest guy and he's doing great work.

I'm also really excited about what we decided to do in the powder bath!! 

Stay tuned for more progress pictures!
~Karli

Monday, February 4, 2013

Karli's Guest Bath Makeover Update

We sure have been busy around here. Two weeks ago it was new windows and last week it was the guest bath shower surround. If you remember from my previous post about the project, we had to re-tile once the new window was installed in that bathroom. What a perfect excuse to get the subway tile I love!

Here's the new room without a lick of decor before I moved anything back in. I really couldn't be happier with the crisp, white tile and the light gray grout. I really think having that darker grout will make this shower look fresh and clean longer than if I'd chosen white grout.

This was also the perfect time to upgrade the plumbing fixture to brushed nickel. The new bath spout actually pours into the tub and not out onto the lip--like it did before because the spout was too short.

In this photo you can see the little nook we had our tile guy build in. Already loving it!

So with a white bathroom, there are so many directions I could go with the decor. For now, the room is for guests so I want it to be a calm, peaceful, clean place. But, knowing how I love color, I couldn't just go plain. I chose this painting, by our real estate agent and friend, Cheryl Sartain, as my inspiration for the space. I'll keep it all fairly clean with white and tan, but there will be purposeful pops of black and orange. 


So here's where the bathroom stands now. It's usable, minus the lack of towel hooks. I took the old rods down and haven't found just the right thing. I know what I'm looking for, I just have to find it! I also need to paint. The current color is a little too pinky/peachy/yellowy for my taste.

 
These are just a few items I've gathered so far. I always love to put necessities in the bath for guests. The shower also holds some soap and shampoos.

I think I'm going to have to leave this room alone for a few months. It would be so easy for me to rip out the toilet, mirror, lights and medicine cabinet. But I'm hitting the pause button...for now. 

What do you think of the results?

~Karli

Thursday, January 17, 2013

Karli's Guest Bathroom Makeover

I posted about getting new windows earlier and I'm already loving the efficiency and warmth (along with the crisp white vinyl) they're providing. But on to the dilemma they also present...


When we decided to replace the window in the guest bath shower, we knew that would mean that the tiles would be impacted. Here's a look at the bathroom from the previous owner...


Not much was necessary right when we moved in since everything was in fairly good condition. (Don't get me wrong, there are things I really despise about the room--like the countertop/sink combo, the builder grade mirror and lights and the ugly old medicine cabinet--but its completely functional.) So basically all that had been done was a fresh coat of white paint and hardware on the cabinet, a new white shower curtain, new cozy khaki runner and some countertop accessories.

In this picture you can see the room without all the accessories I just mentioned. A blank slate for the most part. Oh I almost forgot about the lovely towel bars, which you can see here too.

Here's the current shower tile, complete with special markings from previous little artists.


And the shower/bath fixtures--I'm sure many of you have or previously had beauties like these!


Here's the mirror/light/medicine cabinet area that I dislike so much.


And my real excuse for starting this project now...the damage created when the new window went in.


Here are some of my inspirations for the space.


I've decided on white subway tile, but I'm going to use a light gray grout. White grout is hard to keep clean and the gray grout will provide a nice bit of contrast to a fairly white room.  I'm leaving the tub as is (cost)....and it's in good shape but I'm going to tile all the way up to the ceiling around it.

Eventually I'll get to the mirror, light fixture and medicine cabinet area.

What do you think of white tile with darker grout? I'm loving it!

~Karli

Monday, January 14, 2013

New Windows--Grids or No Grids


Walking through our house during the first showing, we knew there were several things we'd need to update. Wait, who am I kidding? There were A TON of things that needed updating, but some took priority over others. The kitchen was the first thing on the list (a post is coming about that makeover really soon, I promise) followed by painting rooms, new window treatments (bye bye old dingy yellowing curtains), exterior paint and new windows.


One window and the sliding glass door had already been replaced, but everything else was original to our 1980 house. We felt drafts and were cold all the time. There were two windows that desperately needed help ASAP. So we ordered them the month we moved in and a happy mistake happened...


They arrived without the grids! The front of the house has grids in all the windows. The two windows we ordered were in the kitchen and family room on the back of the house, so I had the guys install them anyway and I couldn't be happier.

Now that its time to replace all the remaining windows, we've decided to go with grids on the front of the house (curb appeal) while the back windows have no grids (I love that we can see our gorgeous backyard with no obstruction).

Overall, I think you have to consider the style of your house when you choose "grids or no grids." Here are some examples.
Traditional two story colonial with grids from Houzz.

Colonial style with grids from HookedOnHouses.

I have been seeing some homes with grids on the top half of the windows. At first I didn't think it would look balanced, but after seeing some pictures I'm open to it. Sadly, its too late for our house now. From Houzz.


More pictures to come with our final windows!

~Karli

Tuesday, January 1, 2013

The Ghosts of Projects Past

My very first house was what I'd call a modern traditional home on a corner in Highlands Ranch. It was a fix and flip and empty when I first saw it. It was all fresh, cream paint. The carpet was brand new,the kitchen countertops had been updated to granite tiles (not slab, but for a starter home it worked fine) and the bathrooms had new floor tiles. It was move-in ready and a great place for a single gal to make her own.

Fast forward to 2010 when I got married and Brent moved in. The cute little house became just that...little! In January of 2012 I saw several houses come up for sale in our price range so we quickly met with our fabulous realtor (seriously, she's amazing and I'll gladly share her contact info). We made an offer on our current Littleton house the same day we saw it.

Once we'd made an offer on a new house, we realized we needed to sell the Highlands Ranch house. (Yes we did this a little backwards) So I wanted to share some pictures of the house before we moved--these were taken by a professional photographer for our MLS listing. 
There she is. We'd replaced all the windows in the front, painted the exterior and put a new roof on. Surprisingly one of the complaints we had from potential buyers...the green door! I personally loved it, but I painted it red after one week on the market. Then I had no more complaints.
When you walked in the front door, it was open to the second floor and you could see straight through to the back. You'll begin to see a lot of red from here on. Looking back I think I was too comfortable with that color!
From this shot you can see the terrible florescent light in the kitchen. Of all the things we fixed in this house, we never got to that. (It was the very first thing the new buyers changed--good for them!) I loved the light fixture above the table. It had a wine scene inside the shade. So sad to not be able to use that in our new house!
Here is the living area on the main floor. Brent hated those red couches, so he rarely sat in them. 
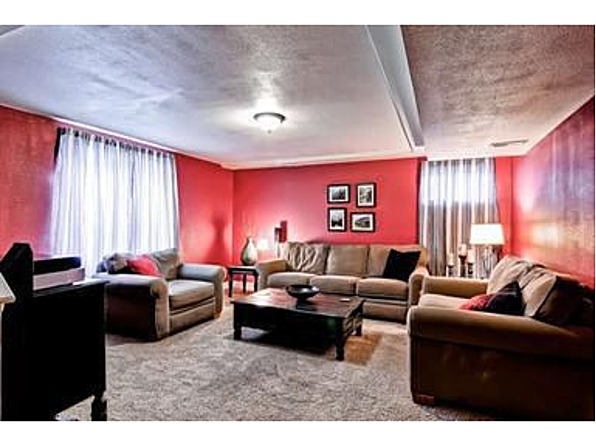
This is the only living space in the basement. Ahh--the red again. If you notice the curtain on the right...that was one of those small basement windows. I know some people wonder what to do with those silly things. If you go ahead and hang a normal curtain on it, the eye won't really know its a little window. It balances the room and felt really cozy down there.
This house featured three upstairs bedrooms and two full bathrooms. This is the master bedroom which went through many transformations. It was tan with a brown accent wall, then I got the new black furniture so we painted it gray. I've since fallen in love with that gray (Sherwin Williams Functional Gray).
Here's a glimpse of the master bathroom. We replaced the builder style mirror and light fixture. One of the very first things Mom and Dad helped me with was building those two wall cabinets. They were totally custom and stored so much stuff! 

When all was said and done, we did a ton of updating in that house. Most of the old brass fixtures were replaced with oil-rubbed bronze. The doors were all painted crisp white.

I think what made this house stand out on the market and sell quickly (21 days) was the character we'd given it, the lack of clutter and the staging. Even though it was a cookie-cutter house, it felt different than its neighbors. It had style!

Do you have a story of updates you made to sell a house? What do you feel paid off for you?

~Karli