Showing posts with label porch. Show all posts

Friday, July 26, 2013

Karli's Exterior Project Done...For Now

Ok, so here it is! The big reveal of our exterior project. By now you know all about the tree projects, the trim projects, paint choices and flower bed plans. It all came together in something I am really proud to call ours!

After all the old evergreen shrubs and bushes were removed (and the giant cottonwood stump was ground out), we started planting flowers. Finally, the flower beds are making all that effort worth it! The flowers are blooming and spreading and, hopefully, growing strong roots. I picked mostly perennials so those beds won't require a ton of work to look great year after year. Here are a couple of progress pictures of the beds.

After the sidewalk was poured we had an even larger space to fill next to the driveway.

 
Earlier in the summer, this pic was taken before we put in edging bricks to define the bed. We also planted a couple more things on the left part of the bed.

We picked Sherwin Williams Pewter Tankard for the body and it is exactly what I wanted. While we were painting my sister and brother in law kept calling it brown. I called it gray. PERFECT. I wanted a gray that didn't turn blue or pink. I wanted it to be almost brown.
This shows that side flower bed filled in. The plants are still growing.

We used Sherwin Williams Extra White for the trim for a really nice crisp pop. And then I ordered black shutters from Home Depot, so we didn't even have to paint those.

And I got my lime green door!

The bench mom made looks amazing on the front porch. As do the black chairs I picked up earlier this summer.
Love that bench! You can also see the door better here too.

I can't wait till the flowers fill out a bit more. (And it will be nice when we re-sod the lawn next year)
Here's the full "after" view with the before picture too. What a difference!
We still have all that empty space where the tree stump was. You'll probably see more posts about that next spring!

Just a reminder of where we started. It was all worth it!

Tuesday, June 18, 2013

Quick Way to Add Patriotic Colors: Porch Pillows for Pat

My neighbor Pat's porch pillows had gotten eaten by the squirrels last summer. She wanted to replace them but she didn't want to spend a small fortune for something that might only last one summer. (The squirrels may find them again!) I told her that for her birthday I would love to make her some new pillows.

She has a great bench and rocker on her porch. Her granddaughter gave her the wonderful wooden Colorado flag that hangs above the bench, so she always decorates in red and blue.

Love the colorful wooden flag! But, she really needs some pillows!
This year she planted red and white flowers in her whiskey barrels to go along with her patriotic color scheme.
These just got planted so they are small.

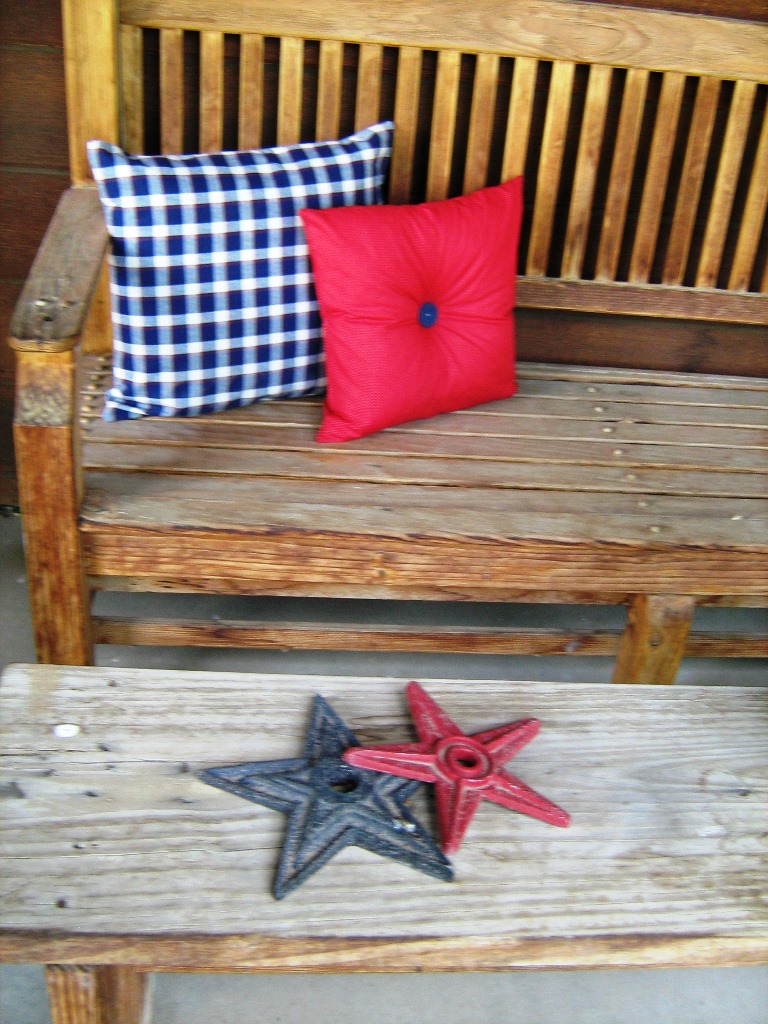
I found (in my stockpile of fabric) some navy plaid that worked great for two of the pillows. I then purchased some red dot to coordinate for another one. 
I used a vintage button on the red pillow.
It had come from a dear friend we both knew.
I think the new pillows look great and really make the front porch a place you want to be.
So, the new pillows are all ready for the squirrels.


Happy Birthday, Pat!
Enjoy the summer,
Kandy

Friday, June 14, 2013

A Sneak Preview: Exterior Project (Almost) Complete

It's hard to believe it's been almost a month since my last post. Where did the time go? What have I been up to? (Eating bonbons and sun-bathing?--I WISH!) Let me tell you a story.

In my last post, I told you about our trim being rotted and needing replacement before paint could begin. I also told you that the work was going to begin the next day. Well, that "little" project turned into a not-so-little nightmare. The contractor we used was very late starting the work, very slow to get the "two day" project done and made a few mistakes along the way that delayed the project even more. It was all I could do not to rant on Facebook and complain on the blog, but my sweet husband kept me from it. (I still have to practice deep breathing when I think about it--and to be honest I did write a Facebook post about my frustrations and when I tried to post, my phone kept giving me an error message. I considered it a sign from God that I should remain positive.)

I don't want to bore you with all the nonsense, so I'll get to the happy stuff. Brent's sister and her husband paint houses on the side of their already full time jobs and lives. They painted our old house and I realized then that their attention to detail is just as strong as mine. Perfect. Needless to say, they did an amazing job on this house too. I almost cried when I pulled up the final evening and it was done.

A year's planning and saving resulted in something I'm proud to call my own!

Here's a sneak preview of a full blown post to come...


I don't think I'd even posted about this! We add a new sidewalk into the mix too. So happy with the results!
 
The first bit of paint going on the house! I was giddy like a little kid!
 
Lime Green front door?! I think YES!
 
Shutters going up (and that last bit of reddish brown trim)!
 
Here's just a little bit of the finished product. More coming in a couple days!

What do you think so far? Better than where we started? :)

Happy Summer,
Karli

Wednesday, May 15, 2013

Exterior Trim Replacement and Paint Colors

While preparing to paint the exterior of our house, in addition to removing trees, we determined that most of the cedar trim was in total disrepair. Completely rotted and disintegrating. Awesome.

So we got a few estimates and the work to replace all the trim (including the four column posts on the front porch) begins tomorrow. I'm so excited. Almost as excited as I am for the day the painting will start.

We continue to apologize to neighbors as we see them. One was nice enough to say, "I like the new chairs you have on the front porch. Are you going to replace the shutters?" This makes me laugh a little bit. Thankfully it is almost over.

We decided on SW Pewter Tankard as the field color, SW Extra White as our trim color and we're purchasing black vinyl shutters from Home Depot (so we don't have to paint those). And the front door will likely be SW LeapFrog. You can see the original color dilemma post here.
We had a limey green front door at our old house (until the silly HOA decided they didn't like the color). I can't WAIT to have one again! Source
SW6431 Leapfrog

Sherwin Williams Pewter Tankard
And just to add to the fun, we're getting a new sidewalk on Saturday. I'll be sure to take before and after pictures.

Ahh, once that paint is done, I'll be so close to completing one of my New Year's Style Resolutions.

~Karli

Sunday, May 12, 2013

Front Porch Bench from Headboard (Birthday Bench)

Karli actually started this project by finding an old wood headboard, just down the street from where she lives.  It was FREE.  But, before picking it up, she called me and asked whether we could use it.  The answer was, "of course, we can always make something out of it!" 

Well she decided she'd like a bench for her front porch, so Dwight and I hauled the headboard to our house and started to work.  Our plan for the bench consisted of reusing 4 spindle legs that had been Brent's, (they came off of a coffee table he longer wanted when they first got married.)  I had saved them.  Now we'll reuse them on this project and give them back.  Since Karli's birthday just happened, this bench will be the perfect gift.
Here is what we started with.....the FREE headboard and the 4 spindle legs.
                                     
We purchased 1 x 4 pine boards to build the framework and top of the bench seat.  We cut the boards to fit within the dimensions of the 54" headboard and also cut small corner pieces (with 45 degree angles on the ends) to join the frame to the legs.
You can see the angle pieces we cut. A bolt joins the framework to the legs.
The framework with all 4 legs attached.

The headboard then gets attached to the frame and braced.
         
Front view with headboard on.
                                  
We did not want screws showing on the top side of the seat where we attached the boards.  So, we cut square stock, attached them to the framework, then screwed the boards on from underneath.
This shows the underneath side.

Karli wants to add pillows.  Arms were needed on this bench to hold those pillows.  So, we had to get creative.  I drew out 4 different arm ideas.  Finally decided on this one...I cut them out.  Then when Dwight set them on for a trial run, he put them upside down!   We both decided that we liked them that way best.  (Go figure!!!)
Here is the arm creation...upside down.
The bench is ready for primer and paint.

I used Rust-Oleum Painter's Touch, Ultra Cover in Semi Gloss.  I really prefer spray painting, it goes so quickly and the bench will sit outside and I wanted it to be durable.
We nicknamed her BB (Birthday Bench)
Karli hasn't seen it yet since it is still at our place.

Happy Birthday Karli........with love from Mom and Dad.  We'll deliver it soon.  Until then, these pictures will have to do!

Kandy