Showing posts with label doors. Show all posts

Friday, July 26, 2013

Karli's Exterior Project Done...For Now

Ok, so here it is! The big reveal of our exterior project. By now you know all about the tree projects, the trim projects, paint choices and flower bed plans. It all came together in something I am really proud to call ours!

After all the old evergreen shrubs and bushes were removed (and the giant cottonwood stump was ground out), we started planting flowers. Finally, the flower beds are making all that effort worth it! The flowers are blooming and spreading and, hopefully, growing strong roots. I picked mostly perennials so those beds won't require a ton of work to look great year after year. Here are a couple of progress pictures of the beds.

After the sidewalk was poured we had an even larger space to fill next to the driveway.

 
Earlier in the summer, this pic was taken before we put in edging bricks to define the bed. We also planted a couple more things on the left part of the bed.

We picked Sherwin Williams Pewter Tankard for the body and it is exactly what I wanted. While we were painting my sister and brother in law kept calling it brown. I called it gray. PERFECT. I wanted a gray that didn't turn blue or pink. I wanted it to be almost brown.
This shows that side flower bed filled in. The plants are still growing.

We used Sherwin Williams Extra White for the trim for a really nice crisp pop. And then I ordered black shutters from Home Depot, so we didn't even have to paint those.

And I got my lime green door!

The bench mom made looks amazing on the front porch. As do the black chairs I picked up earlier this summer.
Love that bench! You can also see the door better here too.

I can't wait till the flowers fill out a bit more. (And it will be nice when we re-sod the lawn next year)
Here's the full "after" view with the before picture too. What a difference!
We still have all that empty space where the tree stump was. You'll probably see more posts about that next spring!

Just a reminder of where we started. It was all worth it!

Friday, June 14, 2013

A Sneak Preview: Exterior Project (Almost) Complete

It's hard to believe it's been almost a month since my last post. Where did the time go? What have I been up to? (Eating bonbons and sun-bathing?--I WISH!) Let me tell you a story.

In my last post, I told you about our trim being rotted and needing replacement before paint could begin. I also told you that the work was going to begin the next day. Well, that "little" project turned into a not-so-little nightmare. The contractor we used was very late starting the work, very slow to get the "two day" project done and made a few mistakes along the way that delayed the project even more. It was all I could do not to rant on Facebook and complain on the blog, but my sweet husband kept me from it. (I still have to practice deep breathing when I think about it--and to be honest I did write a Facebook post about my frustrations and when I tried to post, my phone kept giving me an error message. I considered it a sign from God that I should remain positive.)

I don't want to bore you with all the nonsense, so I'll get to the happy stuff. Brent's sister and her husband paint houses on the side of their already full time jobs and lives. They painted our old house and I realized then that their attention to detail is just as strong as mine. Perfect. Needless to say, they did an amazing job on this house too. I almost cried when I pulled up the final evening and it was done.

A year's planning and saving resulted in something I'm proud to call my own!

Here's a sneak preview of a full blown post to come...


I don't think I'd even posted about this! We add a new sidewalk into the mix too. So happy with the results!
 
The first bit of paint going on the house! I was giddy like a little kid!
 
Lime Green front door?! I think YES!
 
Shutters going up (and that last bit of reddish brown trim)!
 
Here's just a little bit of the finished product. More coming in a couple days!

What do you think so far? Better than where we started? :)

Happy Summer,
Karli

Wednesday, May 15, 2013

Exterior Trim Replacement and Paint Colors

While preparing to paint the exterior of our house, in addition to removing trees, we determined that most of the cedar trim was in total disrepair. Completely rotted and disintegrating. Awesome.

So we got a few estimates and the work to replace all the trim (including the four column posts on the front porch) begins tomorrow. I'm so excited. Almost as excited as I am for the day the painting will start.

We continue to apologize to neighbors as we see them. One was nice enough to say, "I like the new chairs you have on the front porch. Are you going to replace the shutters?" This makes me laugh a little bit. Thankfully it is almost over.

We decided on SW Pewter Tankard as the field color, SW Extra White as our trim color and we're purchasing black vinyl shutters from Home Depot (so we don't have to paint those). And the front door will likely be SW LeapFrog. You can see the original color dilemma post here.
We had a limey green front door at our old house (until the silly HOA decided they didn't like the color). I can't WAIT to have one again! Source
SW6431 Leapfrog

Sherwin Williams Pewter Tankard
And just to add to the fun, we're getting a new sidewalk on Saturday. I'll be sure to take before and after pictures.

Ahh, once that paint is done, I'll be so close to completing one of my New Year's Style Resolutions.

~Karli

Thursday, March 28, 2013

Flea Market Favorites: Top 7 Best Finds

Spring and summer are just around the corner and to me that means garage sales, flea markets (here's one of our favorites) and farm auctions. I get excited just thinking about the bargains and make-over projects I can find. I love the thrill of the hunt.

I have several collections that I'm always willing to add to. Here's the list of what I'm always looking for.


Old Doorknobs and Door Hardware
Great for display as well as projects (like doors)

Vintage Suitcases 
These are all over my house. See my earlier post for some of my favorite ways to use them.

Old Frames     
You can see more of these put to use here.

Framed Relatives 
They don't have to be "your" relatives, just love the look.

Old windows, doors, and shutters
So many uses, you can't have too many of these around. See how we used an old door at Karli's house here and here.

Vintage Ironstone, Platters and Pitchers


I'll never quit adding to my collections.

Furniture Projects
A rocker awaiting its transformation. See more of my favorite chairs here.

A sweet little table just waiting...
See more of my past furniture finds here, here and here (this last one is all about color!).                         

I don't know about you, but just talking about this makes me anxious. I can hardly wait to get out there!  

Happy Hunting!
~Kandy 

Thursday, March 14, 2013

New Entry Closet Love and Twitter

This will be short and sweet. Two things...

I just have to say a big thank you to Mom and Dad for their help getting this new entry closet door in my house. I smile every single time I walk past it--which is several times a day.

It bounces light around in a place that tended to feel a little bit dark and confined. The perfect solution to a small entry. The space really has character now!

You can get a glimpse of a painting in the "after" picture. Read about that fun DIY canvas here.
And another big announcement for Kindred Style...we're on Twitter @kindred_style. Follow us to keep up to date on blog posts as well as other random thoughts.

~Karli

Sunday, March 10, 2013

A New Old Door for Karli's House

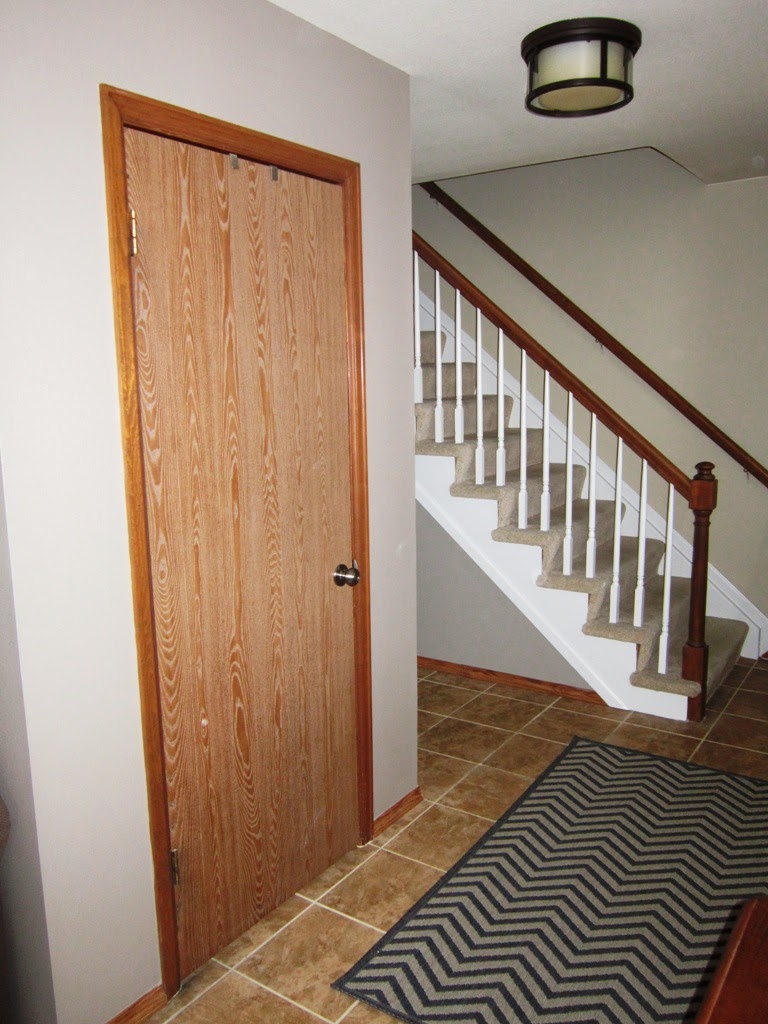
Karli has an entry closet just as you walk into her home. She has had several ideas for making over that area but because she's working on basically every room in their house, she hadn't gotten around to the door yet. 

Here it is...you can see it even took a blow on move-in day...

A close up of the damage
I found a great vintage door at a garage sale several years ago and it has resided in my garage ever since, just waiting for its purpose. I loved all the glass panes and it was already painted black. In one of Karli and my conversations, we discussed perhaps using it at her house. After measuring, we decided it came "close" to fitting. It was only 2 inches too short...that shouldn't be a problem, right?

Karli's Daddy helped with the project. We cut a 2x4 (a board that measures 2 inches in depth and 4 inches in height) to the same width as the door...29 3/4 inches. We cut off the top of it using the radial arm saw, squaring it up to fit the bottom of the door. We then glued it and clamped it to the bottom of the door.


We knew the door was now too long but we wanted to actually cut it off after we got to Karli's house. You know the old saying, measure twice, cut once. Well, that's what we did. Measurements taken over the phone can vary!!!

After the glue was dry, I lightly sanded the door and primed the new board on the bottom. Then we were ready to transport it to Karli's house along with the circular saw, tools and clamps.

When we got to Karli's we removed her old door and sized it up next to the vintage replacement. 
The vintage door is under Karli's closet door for the size-up

We got so lucky...the hinges lined up. The door knob catch was slightly off but we quickly fixed that with a wood chisel. We used the circular saw to cut 2 inches off of the board we had glued on to the bottom. We then drilled holes and reinforced that board with long wood screws. A test fit to make sure it was all a go...we used a small plane to shave off a little where it was rubbing. Then it was time for the fun stuff.

A test fit of the door with the additional piece on the bottom.

Shaving a little off
We could hardly wait to try out Krylon's Looking Glass Spray.We followed the advice from Pinterest and sprayed a mist of water on the glass before applying the Looking Glass. We put three light coats on the inside (or back) of the glass.

A good cleaning before we started spraying

This was just the first coat of Looking Glass, after the water spritz.
We were happy with the effect. It looked like old vintage mirror glass.

After that was dry, I cut squares of paper to lay on the glass, while I gave the back of the door two coats of black spray paint, Krylon Black Satin, followed by a coat of MinWax Semi-Gloss Polyurethane. We let that dry overnight, then turned the door over and repeated the paint process on the front. This time, we taped off the glass.


Finishing with Poly

An up-close of our taping and protecting

We could hardly wait until the next day when everything was dry. We attached the hinges and door knob and hung the "new old door." We were all thrilled with the results.
See another view of the before and after here.


~Kandy (and a little bit of Karli)

Saturday, February 9, 2013

Kandy's Upstairs Hall Makeover Project

The Upstairs Hall project actually started with the simple $1.00 Thrift Store fix on the ugly little light (see the light fixture post). That led to repainting the hall ceiling (flat white) which brightened up the area. But--there is always a "but"--in the process, I had started painting the trim in the guest bedroom which led to painting the doors, etc. To make a long story short...The Upstairs Hall now needed work to be up to par.

The woodwork and doors were stained, hollow-core, builder basic. 

I lightly sanded all the woodwork and doors, removed the door knobs, wiped everything down and then put a coat of primer on. I used my favorite, Zinsser Bulls Eye 1.2.3. Primer. I then applied two coats of Sherwin Williams Extra White to the doors and wood trim.

The doors get the white treatment
I would have loved to replace all the baseboards with new wide white ones, but this project was supposed to be low cost, so instead I painted my baseboards the same color as my walls, Sherwin Williams Camelback. It basically made them disappear and not call attention to the old carpeting (which is another story).

I also would also have loved to purchase all new Oil Rubbed Bronze doorknobs, but again, I took the DIY route. After removing them from the doors, I sanded them with medium grade steel wool. I sprayed them with Krylon Primer in Ruddy Brown. After that was dry, I sprayed them with two coats of Krylon Brushed Metallic Oil Rubbed Bronze in Satin.


Here is one door knob before

Simply the easiest and best spray paint for Oil Rubbed Bronze

The finished door knob

The linen closet door got an old antique door knob plate with the same paint treatment.


I had a salvaged piece of trim that I painted black and added above the closet just for interest.


Karli thinks this looks like a mustache!
Then I had to add a little lock and key decor.

All this work made the rest of hall look like it needed a little sprucing up too.

The before (notice the gold frame)

I spray painted the antique mirror frame Krylon Flat Black, followed with MinWax Spray Polyurethane in Semi Gloss.


I was testing some pictures in that skinny frame--trying to decide what I want in there.

I also painted the mats in these pictures and rehung them. The mats had been an antique ivory and they needed to match all the other white.

The bathroom door (down the hall) got some fun plastic molding glued on it (I used Liquid Nails). I found the molding at a flea market and thought it was a great "girly" detail for my bathroom.


Since I like the idea of running a Bed and Breakfast, and I also think a touch of whimsy is fun, I added a quirky detail to the three bedroom doors. I bought three simple black frames, printed off numbers on my computer and attached them to the doors using Command fasteners. The fasteners can easily be removed if the next owners don't like the idea!!

Close up of the "hotel room numbers"

We now have Rooms 201, 202, and 203. There is no confusion as to which upstairs room I am talking about. I haven't labeled the Linen Closet yet, (maybe maid's supplies)?
  
Since the hall project is complete, I really need to start freshening up Room 203. That comes next. I'm never done.

~Kandy