Showing posts with label table. Show all posts

Monday, April 28, 2014

Going to Market (Painted Furniture For the Show)


Yes we finally get to take some of our great finds to market, The Paris Street Market, that is. We are thrilled to have been chosen to have a booth there on the first Saturday in August. I am working on some great fun things, so I'll give you a little peek!!!


These stools are hardwood, not very old yet really quite heavy and stable, but boring, so here is the before.........      


They got a new vibe with red paint and just for fun..........I added the numbers, so here is the after..............


This enamel top kitchen table is from the 1930's-40's. I had given it a coat of khaki earlier and it was OK, but WOW after having a coat of the same red! It makes a great set with the barstools.


I also had two twin vintage headboards. I forgot to take a before picture but they are just too cute in red!  I think they would be terrific in a kid's room. 


And remember, I still LOVE my White Shabby Chic stuff, so there will be several pieces painted white. Here is a twin headboard that I started with...


Love the distressed white paint on the headboard now. And to compliment the look, a few other white pieces, a shelf, and a coat hanger.


This chair and table got the White Shabby Chic distressing as well.  But, sorry, they are already SOLD. You just get to look at them so you can have a little "décor envy."


As the weather continues to improve, I'll be finding more pieces to share with you before we take them to Market! 

In fact, we are heading to Karli's soon and we'll be working on some pieces there too.


Later, Kandy

Saturday, April 5, 2014

Catering an Art Reception (Another side of my Life)


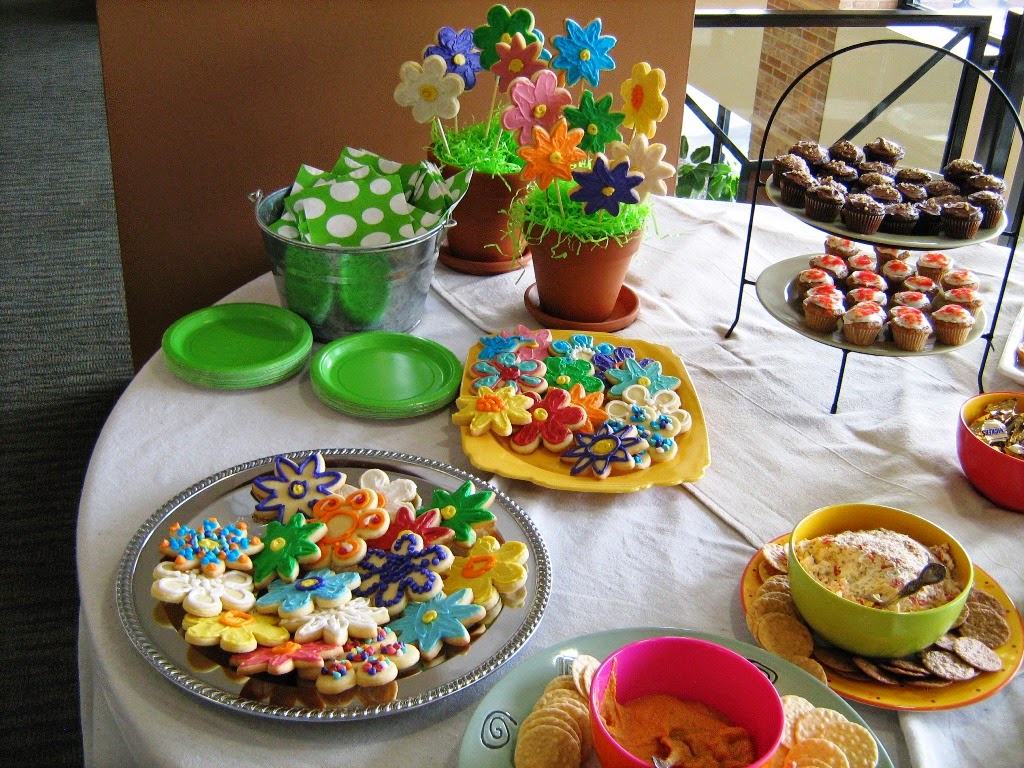
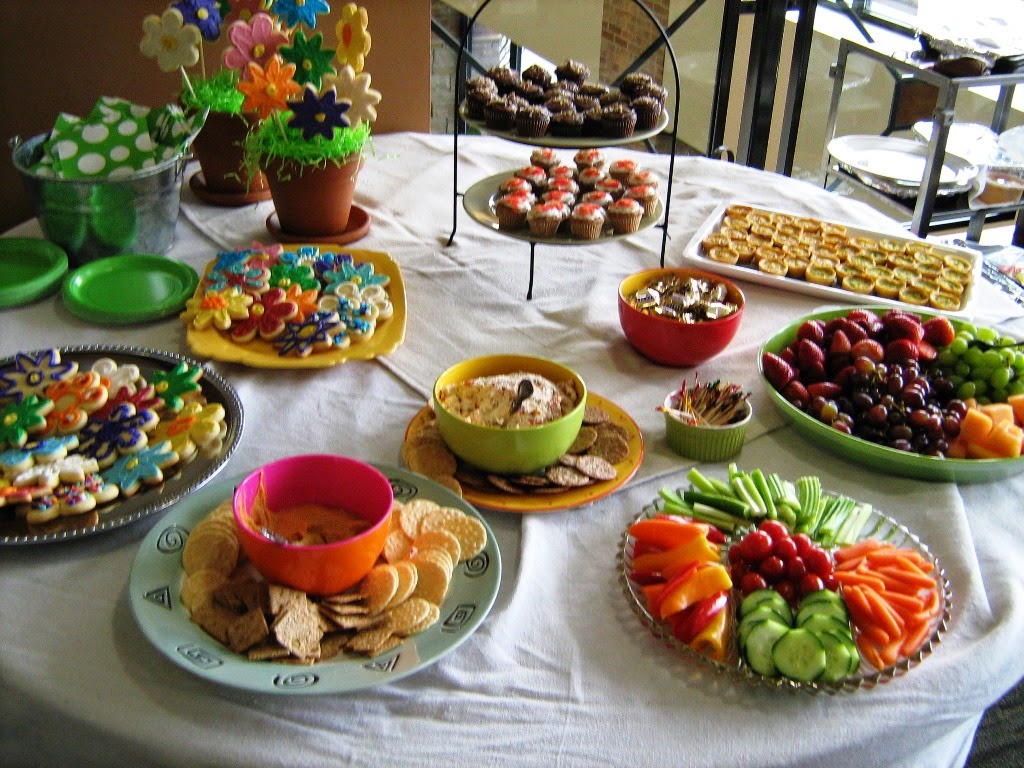
Yesterday evening I catered a reception for my friend Judith. She was having an art show on the second floor of our local hospital, referred to as "the Artrium." I thought it might be fun to share her art with you, as well at letting you enjoy this Spring Party setting. 

Judith is as much fun as her art. Here she is greeting her guests.


This show was especially bright and colorful, so the food table needed to be the same.
The flower shaped sugar cookies were made by another friend of Judith's, who happens to also be her fitness trainer (ironic, I know). They were adorable and a big hit.                                              


The art for this show was light-hearted, fun, and eclectic, as you can see.......


And then my favorite piece. I love the colors and oh my, that green frame!


You can visit Judith's blog here to see more of her work. And you may remember the posts I did about creating her "Art Shed." See Part 1 and Part 2.


Thanks, Judith, for asking me to be a part of this lovely evening filled with food, fun, and your art.

Kandy

Thursday, January 9, 2014

Dining Room Conversion: Part One

Brent and I love to entertain at our house. We often have people over for dinners, bbqs, yard games, game nights and more. We had a need for a larger dining room, but didn't have the money to tear out walls. So one day I told Brent my plan and he thought I was a little crazy...

(Just for a reminder here are two pics of how the front room and dining room were set up)


My crazy plan...Convert the small-ish dining room into a sitting room/wine lounge. To do this, I moved the small loveseat from the front room under the wall of wine art. I also pulled in a small white coffee table, two side tables and two wonderful chairs I'd found a couple years ago at a flea market. I left the bar and hutch in the room.


I love the result! And since we've had the room arranged this way, people have already been sitting on the furniture. When those pieces were in the front room, they were NEVER used.

The room is cozy and comfortable now. It also feels more appropriate for the square footage in the room.


And it's just off the kitchen, so guest can sit in there and enjoy a glass of wine while I'm finishing up meal preparations.


Someday...in my dreams, I'd really love to make that window a set of french doors that open out onto a larger deck in the back yard. It would create really nice flow in and out of the house to the yard. Even better for hosting large gatherings.

For now, we'll enjoy this new lounging area.

And soon, I'll share what we did with our dining table, because I'm sure you're wondering where we're eating our meals now. :)

Karli

Wednesday, October 16, 2013

Judith's New Old Green Table

Soon I will be sharing a new post about my most recent project, converting a shed into an "Artist Studio" for my friend Judith.  In the meantime, I had to jump the gun and share a picture of one special piece of furniture that will be residing in Judith's Art Shed.

Here is a picture of the before:
Judith's father had made this sweet little table.

The table had been residing outside for a little while.  I thought it was so precious and it was special to Judith, so of course we had to find a place for it in the Art Shed.  But it needed a new look for its new home.  Judith is anything but meek and mild, and she is definitely not afraid of color.  It did not surprise me that the color she decided on for the little table would be Sherwin Williams Luau Green.   It is not for the faint of heart.

After lightly sanding what was left of the old peeling paint, the table got two light coats of the fun green.  I then distressed the edges lightly with my sanding sponge.  After that I did a dry brush technique randomly with a brown/gold mixture of acrylic craft paint.  To finish it off, I applied two coats of Minwax Spray Polyurethane Varnish in the Satin Finish.

In this close-up, you can see the dry brush technique.

The little table gets a new life being a lively green.  It took on an entirely new personality, (no wallflower here).   It will go so much better with Judith's art.  I can hardly wait for you to see that!
 
Quite a difference, don't you think?
                                               
I like letting the old nails show. Just think.... her Dad hammered each one of those in.

This white porcelain knob was original to the little drawer.
 
The legs give it a shaker look.
                             
Her father would certainly not recognize it.

The next time you see this table it will be in its new home in Judith's Art Shed.

Until then,
Kandy

Tuesday, October 15, 2013

Host a Holiday Cookie Exchange!

Last year I hosted my first Holiday Cookie Exchange with my girlfriends. It was so much fun and I think all the guests enjoyed their time (and all the goodies they got to take home). Here's how you can do the same!

1. Send out the invitations well in advance so people have time to choose their cookies and bake them. I think three to four weeks is enough notice, but I know how my friend's schedules book up, so I sent mine out for the "2nd Annual Exchange" about eight weeks ahead.
I used this fun template from Evite.com

2. Tell guests how many cookies to make. Final numbers will be determined by RSVPs. I'd been to one cookie exchange where we had to make 10 cookies per person. That was too much. So for my parties I say 2-3 cookies per guest. So if there are 12 guests you'd be required to make 24-36 cookies each. That's much more doable.

3. Have guests print their cookie recipe for everyone. I didn't do this my first party but I think it's a really nice touch.

4. Here's the fun part!! Decorate and make appetizers!! Last year I made meatballs, crostini, a veggie tray and fried (baked) ravioli. We had hot chocolate, coffee, wine and a few sodas to drink.
The cookie exchange savory snack spread!

5. Set up one big table or several smaller tables for the cookies. Make sure there is room for guests to walk around in a circle and gather their cookies.

6. Have plenty of saran wrap, wax paper and some extra containers on hand. (Guests should be instructed to bring their own empty container, but it's always nice to have some on hand, just in case).

7. Entertain, mingle, take pictures, have fun!

8. When it's time for the formal exchange I really enjoy having each guest share which cookie they made and a little bit about the cookie--why they chose it, what's in it, how hard was it, etc.

9. Go around in a circle and have each guest take the given number from each container.

10. Mingle more, take more pictures and then sit back and soak up the success of your party.
Love these ladies!
I can't wait for this year's party. I've started a group Pinterest Board with cookie recipe ideas and I've got great plans for making the party even more fun.

Happy (early) Holidays!
Karli