Showing posts with label windows. Show all posts

Thursday, January 9, 2014

Dining Room Conversion: Part One

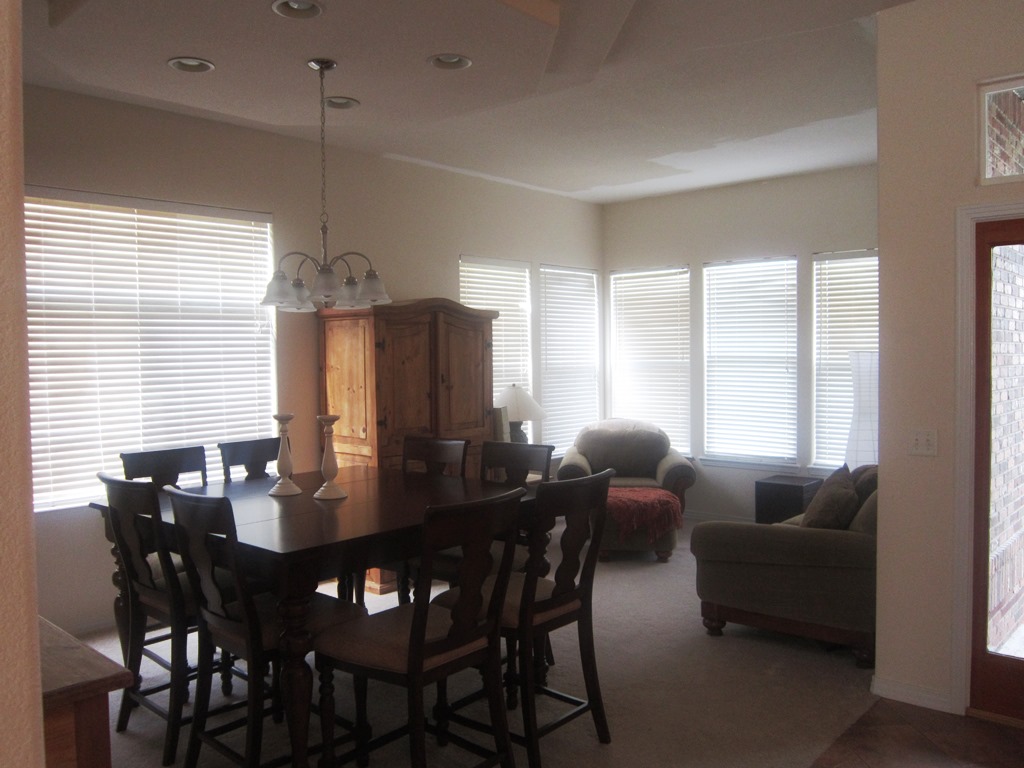
Brent and I love to entertain at our house. We often have people over for dinners, bbqs, yard games, game nights and more. We had a need for a larger dining room, but didn't have the money to tear out walls. So one day I told Brent my plan and he thought I was a little crazy...

(Just for a reminder here are two pics of how the front room and dining room were set up)


My crazy plan...Convert the small-ish dining room into a sitting room/wine lounge. To do this, I moved the small loveseat from the front room under the wall of wine art. I also pulled in a small white coffee table, two side tables and two wonderful chairs I'd found a couple years ago at a flea market. I left the bar and hutch in the room.


I love the result! And since we've had the room arranged this way, people have already been sitting on the furniture. When those pieces were in the front room, they were NEVER used.

The room is cozy and comfortable now. It also feels more appropriate for the square footage in the room.


And it's just off the kitchen, so guest can sit in there and enjoy a glass of wine while I'm finishing up meal preparations.


Someday...in my dreams, I'd really love to make that window a set of french doors that open out onto a larger deck in the back yard. It would create really nice flow in and out of the house to the yard. Even better for hosting large gatherings.

For now, we'll enjoy this new lounging area.

And soon, I'll share what we did with our dining table, because I'm sure you're wondering where we're eating our meals now. :)

Karli

Saturday, September 7, 2013

The McOlson House: Making It Their Own

Meet Marie.

I was honored to have Marie as a beautiful bridesmaid during my wedding

I met her our freshman year of college. We were on the same floor in the dorms and soon decided we'd like to share off-campus housing once we were allowed to move out. We lived together for two years, in a tiny apartment and a rented single family house, so I had a pretty good idea about her style. She's one of those friends that you can pick right back up with, even if it's been months since you last talked.   

Marie and her husband Travis recently bought a house. She asked me to come over and give them some ideas on paint colors, layout, finishing touches, etc. I jumped at the chance! I spent a morning with the two of them, talking about pieces of furniture they had to keep, what we could change, what they like and don't like. Then I took pictures and measurements and started planning with mom. We did a lot of our brainstorming via a secret board on Pinterest. (Have you tried that? It's amazing!)

So here are the before photos of the space. Their biggest concern was the paint. The pale yellow is so not them. They want to add color, but aren't sure where or how much. So my goal is to add punches of color within a neutral palate.

As you walk in the front door, this room is on your right. It's a dining room/formal sitting room. You can see that they started to paint the ceiling white, but it made the yellow-ish paint look worse. So right now that's on hold until we pick a paint color.
 
This is the couch (with a matching chair) in the front room. We'll work with this, just switching up the placement and pillows.
 
This is the dining room view. The table is cocktail height. The light fixture is change-able as well.
 
The next room you walk into is the open, spacious kitchen. The granite color is great. They don't love the tile floor or backsplash, so I'll come up with some ideas for that as well.
 
From the kitchen you can see into the family room, where they spend the majority of their time. We'll work with all the furniture in here. Paint, window treatments and some punches of color will finish this off nicely.
 
This is a piece of art Marie recently bought. I am actually using it as my inspiration for the pops of color I'll use in the entire space. I'm thinking of hanging it on a wall you see right when you walk in--a point of view where you can see all the rooms. It will all make sense from that vantage point.
 

Mom and I were putting finishing touches on our design boards this weekend. I'll present them to Marie and Travis and get their feedback so we can make any adjustments before they're considered final.

This is SO fun!

Stay tuned for more,
Karli

Saturday, May 25, 2013

New Shades for the French Country Bedroom

It has been quite some time since I mentioned that I was going to remake and reuse some draperies in the French Country Bedroom, see the earlier post.  Well I am finally making that happen.  The repainting is all done.  There is no excuse now.
 
Really love the white window trim but we need
some draperies.
I had black and white toile draperies that had been in my bathroom.  I had purchased them at Target and still loved them.  They were perfect to reuse in the French Country Bedroom.  However, the draperies indicated dry clean only but, guess what....


Washing them in the washer on gentle, cold water, with Woolite worked just fine. 

         
I didn't put them in the dryer, just laid them flat to make sure they didn't shrink.  Then
I cut the two panels in half, making four panels with valances to fill the center.
      This just entailed cutting and hemming.
Loved them but it left a lot of wide open views for any guest who might be undressing at bedtime!
 
The draperies were on the "skimpy" side, since this was a make-do, make-over project, so I knew I had to fill in with additional curtains or something.  I had somewhat of a plan that I wanted to make shades out of black and white pillow ticking.  Years ago, I had purchased some of the ticking at Wal-Mart to cover the seat of this little stool. 
I had quite a time finding more of this ticking fabric.

I finally found the fabric like this online.  My plan on how to make the shades wasn't really concrete.  I had ordered yardage based on the size of my windows but I wasn't exactly sure what I was doing.  I bet nobody else does that!!
Here are my ponderings...
I had the pillow ticking fabric, curtain tiebacks that came with the toile draperies and available curtain rods.
 I sewed a pocket on both top and bottom and hemmed the sides.
The ticking fabric was 54" wide.  The small window was 47 1/2" wide, so I made that shade first.  I cut some of the fabric off to save for the big window which measures 65" wide.  Did I mention that I always pray when I make things without a concrete plan?  I definitely appreciate a little divine intervention!

I used the simple (cheap) valance curtain rod on the top and put the black metal rod on the bottom.  Having the round rod on the bottom of the shade allows me to roll it up .  Then I just had to figure out how to hold it in place after rolling it up!!!!
 I tried to reuse the curtain tiebacks but,
which way do I attach them and how?
The shades will probably be up most of the time and only lowered when we have company that would like some privacy or don't want to awaken at first light.  I decided reusing the tiebacks just wasn't going to work.  I made new tie-ups, flat ribbons of fabric, finished 3 inches wide.  I sewed Velcro strips on them to hold the shades at the desired height.  I also added a decorative black button.
This was Plan B.
The ribbon tie-ups, (or whatever you want to call them) are not fastened on so they can be moved or easily adjusted.
The big window.
The small window with the shade rolled up.
The small window with the shade down.
I even had enough fabric left-over to make a new pillowcase.
The French Country Bedroom is now ready for guests.  They can undress in privacy or sleep late if that is their desire.  But, they must remember.......


Glad this project is completed and I'm moving on to the next!
Kandy

Thursday, March 28, 2013

Flea Market Favorites: Top 7 Best Finds

Spring and summer are just around the corner and to me that means garage sales, flea markets (here's one of our favorites) and farm auctions. I get excited just thinking about the bargains and make-over projects I can find. I love the thrill of the hunt.

I have several collections that I'm always willing to add to. Here's the list of what I'm always looking for.


Old Doorknobs and Door Hardware
Great for display as well as projects (like doors)

Vintage Suitcases 
These are all over my house. See my earlier post for some of my favorite ways to use them.

Old Frames     
You can see more of these put to use here.

Framed Relatives 
They don't have to be "your" relatives, just love the look.

Old windows, doors, and shutters
So many uses, you can't have too many of these around. See how we used an old door at Karli's house here and here.

Vintage Ironstone, Platters and Pitchers


I'll never quit adding to my collections.

Furniture Projects
A rocker awaiting its transformation. See more of my favorite chairs here.

A sweet little table just waiting...
See more of my past furniture finds here, here and here (this last one is all about color!).                         

I don't know about you, but just talking about this makes me anxious. I can hardly wait to get out there!  

Happy Hunting!
~Kandy 

Monday, February 4, 2013

Karli's Guest Bath Makeover Update

We sure have been busy around here. Two weeks ago it was new windows and last week it was the guest bath shower surround. If you remember from my previous post about the project, we had to re-tile once the new window was installed in that bathroom. What a perfect excuse to get the subway tile I love!

Here's the new room without a lick of decor before I moved anything back in. I really couldn't be happier with the crisp, white tile and the light gray grout. I really think having that darker grout will make this shower look fresh and clean longer than if I'd chosen white grout.

This was also the perfect time to upgrade the plumbing fixture to brushed nickel. The new bath spout actually pours into the tub and not out onto the lip--like it did before because the spout was too short.

In this photo you can see the little nook we had our tile guy build in. Already loving it!

So with a white bathroom, there are so many directions I could go with the decor. For now, the room is for guests so I want it to be a calm, peaceful, clean place. But, knowing how I love color, I couldn't just go plain. I chose this painting, by our real estate agent and friend, Cheryl Sartain, as my inspiration for the space. I'll keep it all fairly clean with white and tan, but there will be purposeful pops of black and orange. 


So here's where the bathroom stands now. It's usable, minus the lack of towel hooks. I took the old rods down and haven't found just the right thing. I know what I'm looking for, I just have to find it! I also need to paint. The current color is a little too pinky/peachy/yellowy for my taste.

 
These are just a few items I've gathered so far. I always love to put necessities in the bath for guests. The shower also holds some soap and shampoos.

I think I'm going to have to leave this room alone for a few months. It would be so easy for me to rip out the toilet, mirror, lights and medicine cabinet. But I'm hitting the pause button...for now. 

What do you think of the results?

~Karli

Monday, January 14, 2013

New Windows--Grids or No Grids


Walking through our house during the first showing, we knew there were several things we'd need to update. Wait, who am I kidding? There were A TON of things that needed updating, but some took priority over others. The kitchen was the first thing on the list (a post is coming about that makeover really soon, I promise) followed by painting rooms, new window treatments (bye bye old dingy yellowing curtains), exterior paint and new windows.


One window and the sliding glass door had already been replaced, but everything else was original to our 1980 house. We felt drafts and were cold all the time. There were two windows that desperately needed help ASAP. So we ordered them the month we moved in and a happy mistake happened...


They arrived without the grids! The front of the house has grids in all the windows. The two windows we ordered were in the kitchen and family room on the back of the house, so I had the guys install them anyway and I couldn't be happier.

Now that its time to replace all the remaining windows, we've decided to go with grids on the front of the house (curb appeal) while the back windows have no grids (I love that we can see our gorgeous backyard with no obstruction).

Overall, I think you have to consider the style of your house when you choose "grids or no grids." Here are some examples.
Traditional two story colonial with grids from Houzz.

Colonial style with grids from HookedOnHouses.

I have been seeing some homes with grids on the top half of the windows. At first I didn't think it would look balanced, but after seeing some pictures I'm open to it. Sadly, its too late for our house now. From Houzz.


More pictures to come with our final windows!

~Karli