Showing posts with label before. Show all posts

Monday, May 5, 2014

Busy Birthday Weekend


***pic heavy post!***

This past weekend was a whirlwind! Mom and Dad came up to Denver for a visit. We were celebrating my birthday and Mother's Day a little bit early. Mom also brought several pieces of furniture to store in my garage prior to the Paris Street Market. Dad wanted to pour a step in our garage and I wanted to refinish a few pieces of furniture of my own. It was busy to say the least.

I'll do a full post on the furniture pieces but here's a bit more about the step. The step leading out to our garage from the house had a problem....the floor below it had sunk, so there was a REALLY LARGE drop. Brent and I were sort of used to it, but everyone who stepped down got a big surprise. So we needed to fix it!

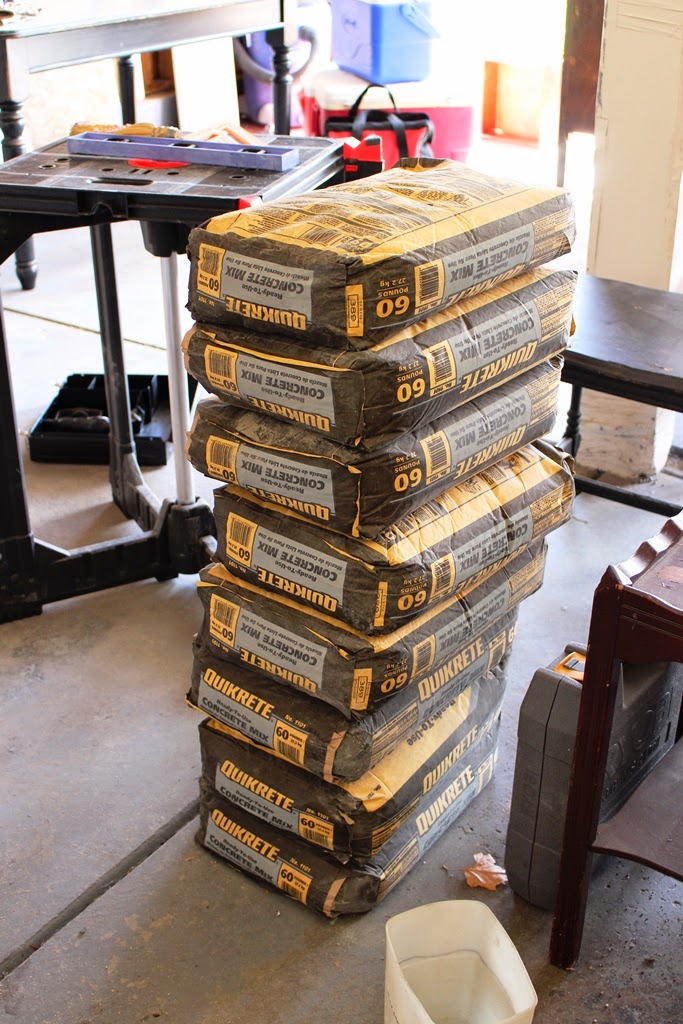
Eight bags of Quickcrete. Looked like a lot, but surprisingly we needed all but one of the bags.
 
My dad loves to study projects. He also loves to engineer ways to build things. He had been planning this for weeks.


Building the supports and the frame.


Here you can see the large drop off and the gap between the single step and the floor.

 
These were the ingenious supports Dad dreamed up for the frame. We needed something strong so the cement wouldn't just ooze out.


Some of the important tools. We were rocking and rolling at this point!


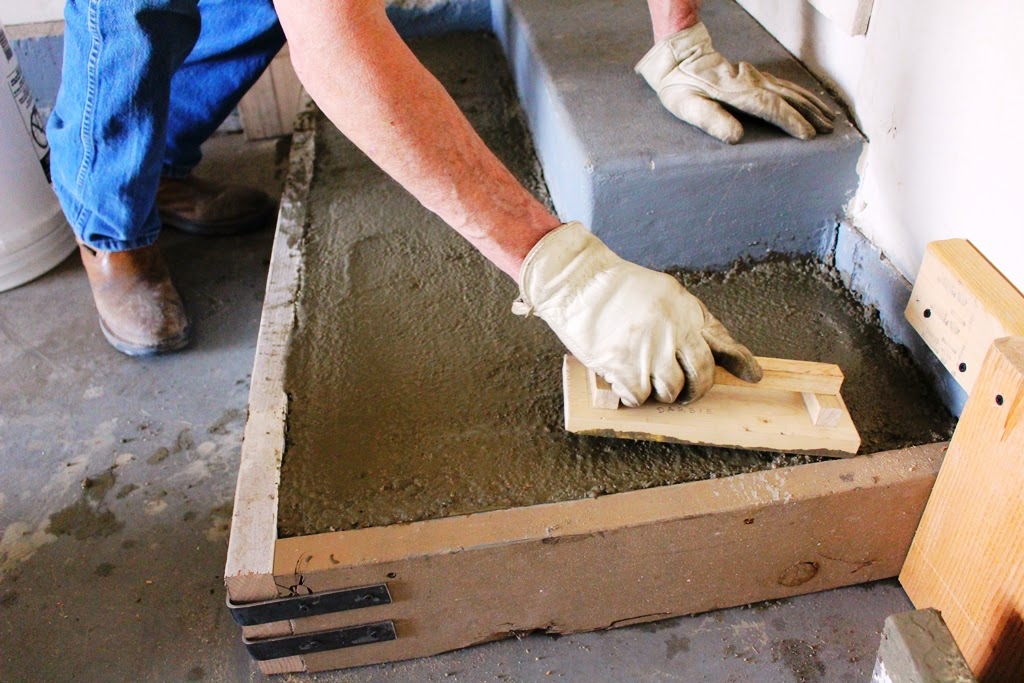
This was just a small part of the mixing process. Mom and I were the lucky ones who got to mix the Quickcrete and lug it over to the step. Dad took care of smoothing it out.


Working with Quickcrete was DUSTY. Thank goodness for masks.  


Here Dad is using a tool he built called a "darbie." It is very smooth and levels out all the concrete.


It is SO wonderful to have two easy steps into the house instead of one giant step.

PS...we tried to put Porter's paw print in the step, but we waited too long. It was too hard to make an imprint!


Saturday evening we went to one of my favorite local Italian restaurants to eat a glutinous meal. (Although Mom and I did share ours, so it wasn't quite as bad as it could have been!) Even if you don't like eggplant parmesan, I would dare you to try this one. It's been known to make converts of eggplant haters!


Sunday afternoon we smoked ribs and completed a few more projects. My dad proclaimed this would be his choice for a dying meal.


Now here's a little preview of the other pieces of furniture we refinished. I'll post more this week. I can't WAIT to show you how these turned out.


Hope you're having a great week!
Karli

Wednesday, April 9, 2014

Planning To Reality: Our New Shed


I told you earlier this year about our hopes of building a shed in our backyard. I'm happy to say, the building is up!

In order to get that building up, we've had to do lots and lots of planning.


First we had to decide on the type of shed we wanted. We decided to go with TuffShed based on great recommendations from several friends. We went to visit our local TuffShed retail location and worked with a great salesman, who gave us some discounts and worked with us to customize it exactly as we wanted.

Second we had to figure out just exactly where we wanted the shed and how it should be positioned. This is where Brent and I disagreed (for a little while). But I won and the shed now sits how I envisioned from the beginning.


Next we had to find out where our sprinkler lines where. The last thing I wanted was to put this building down over the top of lines that we may need to move or fix some day.  So I started digging around the perimeter I'd outlined above.


Once we determined that our chosen location was "safe," we had the shed built. These guys were quick! The space went from nothing to done (sort of) in just over two hours.


NOW, you may notice that the shed is a different color than our house. No, we didn't chose that as our final palate. We are just trying to save money. So we're planning to paint it once the weather warms up to match the house. (We have leftover over paint from last summer's painting)

We also have plans to move the fence line forward a bit. Once that is done, we'll have a new cement pad and sidewalk laid down leading from the front of the house to the shed in the back.

And this spring, I'm going to plant some perennials on the side of the shed in a small bed for some added color.

Lots left to do, but we're already so happy to have the extra storage space--the freedom to move around in our garage now.

Here's to SPACE!!
~Karli

Friday, January 17, 2014

Refreshing a Master Bedroom


Today I'm sharing a little bit of a refresh on our master bedroom.

I showed you all our master bedroom a while ago, but since then we've added a couple things.


It went from this when we moved in....

 
To this last spring...


To play off the yellow that I've been loving, we purchased a large yellow rug from IKEA. I love the pop of color it adds to the room! It makes you not notice the bad carpet as much...or at least that's what I tell myself. :)


The next thing I did was add two mirrors. I hung them behind each of our side tables. I love how they bounce the light around the room! They also add some weight to the otherwise large, overbearing wall.


We also added the yellow throw. We keep it on the foot board, because it's really just for looks.


Porter decided to take a snooze during the middle of this photoshoot. I can't blame him.

We also got a close-out Sleep Number Bed under those covers. We can both have our own firmness now and we're sleeping better!

There are things I still want to do to this room. First, I'd like a larger sitting chair over in the corner where the small black wood chair is (something I can look for at flea markets this summer). I'd also like to replace the baseboards with the large white ones we used on the main floor. Obviously carpet is on my list too, but that will be quite a ways down the road. And looking at these photos makes me think I need some larger pillows behind the white ones on the bed. There's always something to do!

Here's to another year of style (and better sleep too!)
~Karli

TDC Before and After Party

Love participating the Thrifty Decor Chick's Before and After Parties! Here's to many more!

Thursday, January 9, 2014

Dining Room Conversion: Part One

Brent and I love to entertain at our house. We often have people over for dinners, bbqs, yard games, game nights and more. We had a need for a larger dining room, but didn't have the money to tear out walls. So one day I told Brent my plan and he thought I was a little crazy...

(Just for a reminder here are two pics of how the front room and dining room were set up)


My crazy plan...Convert the small-ish dining room into a sitting room/wine lounge. To do this, I moved the small loveseat from the front room under the wall of wine art. I also pulled in a small white coffee table, two side tables and two wonderful chairs I'd found a couple years ago at a flea market. I left the bar and hutch in the room.


I love the result! And since we've had the room arranged this way, people have already been sitting on the furniture. When those pieces were in the front room, they were NEVER used.

The room is cozy and comfortable now. It also feels more appropriate for the square footage in the room.


And it's just off the kitchen, so guest can sit in there and enjoy a glass of wine while I'm finishing up meal preparations.


Someday...in my dreams, I'd really love to make that window a set of french doors that open out onto a larger deck in the back yard. It would create really nice flow in and out of the house to the yard. Even better for hosting large gatherings.

For now, we'll enjoy this new lounging area.

And soon, I'll share what we did with our dining table, because I'm sure you're wondering where we're eating our meals now. :)

Karli

Wednesday, January 1, 2014

Powder Bath Reveal!

As promised, today I'm revealing our new main floor powder bath! I'm so excited to share the progression of this drab little bathroom.
 
It started like this. Tan, brown, builder-grade mirror and lighting. It also had a medicine cabinet on the small wall to the right of the sink. The floors were tan tile.
 
 
Some paint on the walls and cabinets, new cabinet hardware, a new mirror and towel rack, and the addition of some DIY paintings made the space look better.


We covered up the medicine cabinet hole with a painting.

 
And then, when it was time to get new floors on the main level, we just tore the entire thing out! It was liberating.


So, on to the big reveal after the new floors. Here was our inspiration post.
 
Love this new sign on the door that I found at an antique mall. People never knew which door was the bathroom. Now there's no question. :)


The hall where the bathroom lives looks so different now too!


When you open the door you're greeted with a brighter, clean looking room. I plan to change out the towel and a few other small items each season. For now, it's red for the recent Christmas season.
 
 
We need a bit of art to hang on the walls, but for now I'm loving the clean lines of the tall beadboard.
 
 
The vanity and sink are from IKEA. My dad helped me install it. I love how tall it is and how easy the sink is to clean. There's just something about a spotless white sink.
 
 
The vanity is awesome! The drawers are soft close, which I love. And the bottom one is tall enough to hold spray bottles, so all of our cleaning supplies live in here! I also love how it sits on little legs instead of on the floor. It looks like a piece of furniture now.
 
 
And that hole where the medicine cabinet was is now invisible. (Can I just point out that sink again?! Love that its all one piece!)
 
 
Here's another point of reference for where this bathroom lives in our house.
 
 
Just between the front door and kitchen. By the way, do you love that I painted all the trim bright white and the doors black?! I can't get over what a difference it makes in the house. It has a classy, timeless look. (And those new floors...are you kidding me?)
 
 
And another new piece that lives in that hall...
 
 
I found this at the antique mall too. It's a lovely pond with trees reflecting in the water. It makes me feel calm and serene. The black and white decor is really working in this part of the house.
 
Thanks for stopping by to see our latest makeover. Working on a home can be a slow, tedious process. But as we complete rooms and projects like this, it gives a huge sense of accomplishment. We did it!


All my best,
Karli