Showing posts with label kitchen. Show all posts

Thursday, January 9, 2014

Dining Room Conversion: Part One

Brent and I love to entertain at our house. We often have people over for dinners, bbqs, yard games, game nights and more. We had a need for a larger dining room, but didn't have the money to tear out walls. So one day I told Brent my plan and he thought I was a little crazy...

(Just for a reminder here are two pics of how the front room and dining room were set up)


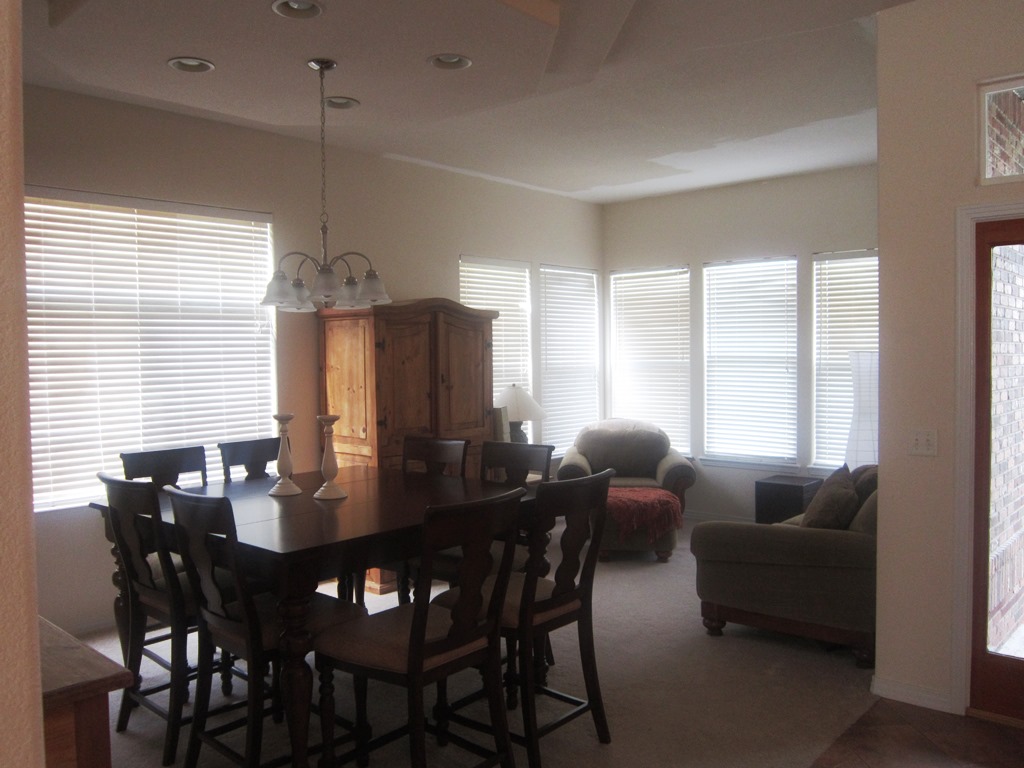
My crazy plan...Convert the small-ish dining room into a sitting room/wine lounge. To do this, I moved the small loveseat from the front room under the wall of wine art. I also pulled in a small white coffee table, two side tables and two wonderful chairs I'd found a couple years ago at a flea market. I left the bar and hutch in the room.


I love the result! And since we've had the room arranged this way, people have already been sitting on the furniture. When those pieces were in the front room, they were NEVER used.

The room is cozy and comfortable now. It also feels more appropriate for the square footage in the room.


And it's just off the kitchen, so guest can sit in there and enjoy a glass of wine while I'm finishing up meal preparations.


Someday...in my dreams, I'd really love to make that window a set of french doors that open out onto a larger deck in the back yard. It would create really nice flow in and out of the house to the yard. Even better for hosting large gatherings.

For now, we'll enjoy this new lounging area.

And soon, I'll share what we did with our dining table, because I'm sure you're wondering where we're eating our meals now. :)

Karli

Monday, December 2, 2013

New Floors Finally Going In!

Two years of waiting and it's finally happening. Our main floor carpet and tile was torn out and we're getting our new "wood" floors. See the backstory here.


One week of time, lots of man hours, two bagster bags full of demo trash, thousands of staples and several sore muscles later...we had this.


Tearing out the carpet and the staples in the dining room and front room was a breeze compared to what we had ahead of us with the tile.

The layers went like this:
  1. Ceramic Tile
  2. Grout
  3. Tan brick vinyl
  4. Thin wood underlayment
  5. Thousands of tiny staples
  6. Tan vinyl
  7. Glue
  8. Thousands of tiny staples

SHOOT ME NOW!

 
Brent was not happy at this point
 
Pulling up the wood underlayment, exposing thousands of staples that we had to pull one by one

Thanks to my mom and dad for their hours of staple pulling and bathroom demo.


Porter was a huge "help"

At this point in the demo, we hosted Thanksgiving dinner. (I'm not kidding). Brent's sweet sister and her family joined us as we ate a wonderful dinner in the front room, with no furnishings and no flooring. We'll have fun memories of this Thanksgiving.


(Did I mention that we decided to tear out the powder bath too?!) We have a perfectly good cabinet and sink top if you're interested!
 
 
Empty powder bath as it stands now.

As I sit here this evening, I'm already marveling at how beautiful the new floor is looking. The installer is the nicest guy and he's doing great work.

I'm also really excited about what we decided to do in the powder bath!! 

Stay tuned for more progress pictures!
~Karli

Sunday, September 15, 2013

The McOlson House: Design Boards

Yesterday was a fun day! Karli delivered Marie and Travis the design boards we put together for their main living areas. This included the front room/dining room, the kitchen space and the family room. Below you can see each room's design board with notes for the two fo them as they start to execute the plan.

While Karli was there, the placement of the furniture in the front room was adjusted and Marie sent me a message today saying that she's going to buy the paint right now.

Here's the front room design. The walls will be SW Accessible Beige and the ceilings will be white.

Marie's front room


A view of the room
 
The front room and dining room are open to one another, so they all need to be the same paint color. We also wanted to repeat the mustard/yellow accent by painting their side board and then hang that "inspiration piece" above. You will see that piece right as you walk in the house, so all the accent colors have been chosen to play off that.

The dining room view
 
 
Marie's Dining Room


Next up is the kitchen. They shared the floors they've chosen for the entry, kitchen and family room and we must have guessed correctly, because something very similar is represented below. We talked about painting their island SW Tricorn Black as shown below. Then potentially dropping three pendants. The eat-in kitchen will get a new light too. This whole space and the adjacent family room will be SW Functional Gray.

Kitchen view

Marie's kitchen


And finally, the room that presented the more challenging aspects of the entire project. The room is large and expansive. It also has a large wall that is calling for some art. The location of the TV required some creative thinking.
Family room view


So we've proposed two large square canvases hung vertically above the black console to draw the eye up. We also suggested adding a small bookcase under the TV, near to the stair railing to "ground" the TV. It should be painted the same color as the walls for balance.

We left lots of options for patterened curtains and rugs. We wanted them to be able to choose their favorite within their budget and timeframe. Their existing furniture will work in the room (rearraged ever so slightly) with potential additions of a chair (in an accent color like teal) and some transitional seating like poufs or cubes.

We also suggested that they paint the inset where the clock hangs over the fireplace a green. It will balance the two green canvases hung on the adjacent wall.  

Marie's family room


We really enjoyed putting these boards together and can't wait to see how it all comes together.

Kandy and Karli

Saturday, September 7, 2013

The McOlson House: Making It Their Own

Meet Marie.

I was honored to have Marie as a beautiful bridesmaid during my wedding

I met her our freshman year of college. We were on the same floor in the dorms and soon decided we'd like to share off-campus housing once we were allowed to move out. We lived together for two years, in a tiny apartment and a rented single family house, so I had a pretty good idea about her style. She's one of those friends that you can pick right back up with, even if it's been months since you last talked.   

Marie and her husband Travis recently bought a house. She asked me to come over and give them some ideas on paint colors, layout, finishing touches, etc. I jumped at the chance! I spent a morning with the two of them, talking about pieces of furniture they had to keep, what we could change, what they like and don't like. Then I took pictures and measurements and started planning with mom. We did a lot of our brainstorming via a secret board on Pinterest. (Have you tried that? It's amazing!)

So here are the before photos of the space. Their biggest concern was the paint. The pale yellow is so not them. They want to add color, but aren't sure where or how much. So my goal is to add punches of color within a neutral palate.

As you walk in the front door, this room is on your right. It's a dining room/formal sitting room. You can see that they started to paint the ceiling white, but it made the yellow-ish paint look worse. So right now that's on hold until we pick a paint color.
 
This is the couch (with a matching chair) in the front room. We'll work with this, just switching up the placement and pillows.
 
This is the dining room view. The table is cocktail height. The light fixture is change-able as well.
 
The next room you walk into is the open, spacious kitchen. The granite color is great. They don't love the tile floor or backsplash, so I'll come up with some ideas for that as well.
 
From the kitchen you can see into the family room, where they spend the majority of their time. We'll work with all the furniture in here. Paint, window treatments and some punches of color will finish this off nicely.
 
This is a piece of art Marie recently bought. I am actually using it as my inspiration for the pops of color I'll use in the entire space. I'm thinking of hanging it on a wall you see right when you walk in--a point of view where you can see all the rooms. It will all make sense from that vantage point.
 

Mom and I were putting finishing touches on our design boards this weekend. I'll present them to Marie and Travis and get their feedback so we can make any adjustments before they're considered final.

This is SO fun!

Stay tuned for more,
Karli

Sunday, March 24, 2013

Karli's Kitchen Makeover: Part Three

This post will round out the series about how we made over our 1980's dark, dated kitchen. (Read Part One and Part Two)

We did this all on a budget, but I still think it looks really great. We didn't move any walls or change the location of any appliances. Basically we left the footprint the same, but updated everything.

Part Two left off with the new countertops and subway tile backsplash installed. This post shows all the finishing touches that make me really fall in love with the space.


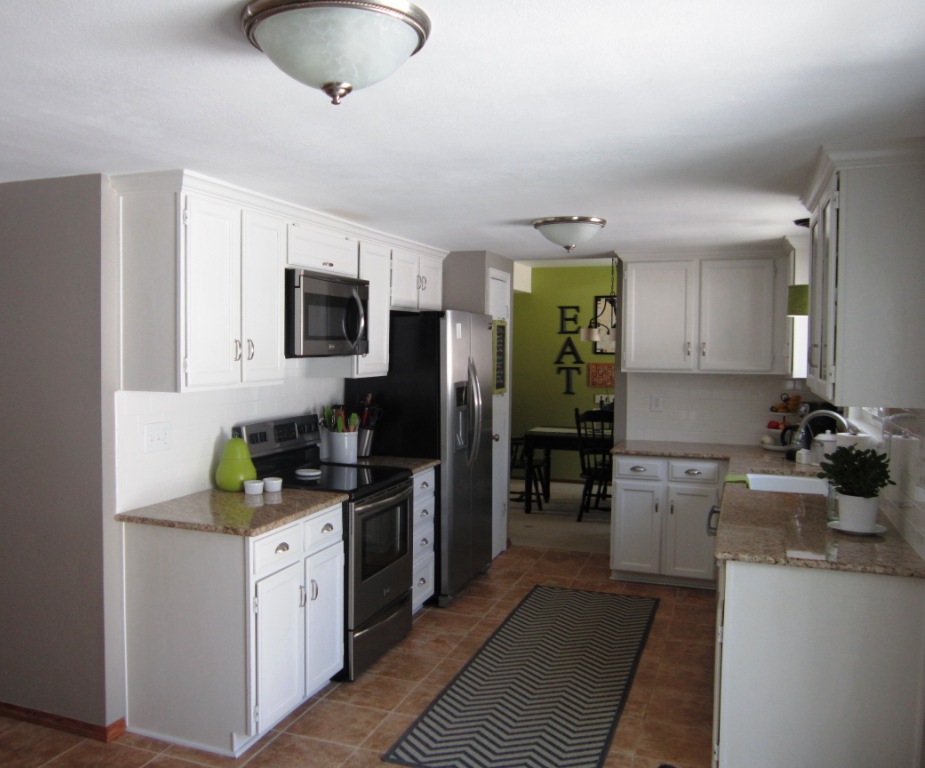
The space is so bright and clean looking now. The runner is from Ballard. It's indoor/outdoor, which is perfect for a kitchen space. We can wipe up spills with water or take it outside to hose off if it were to get that dirty.


That light from Ballard is genius. There was a pot light there. This new light has a pot light adapter for installation that took me 2 minutes. The shades come in different colors. Mom sewed that little valance for me from an extra curatin I bought from Z Gallerie to match the sliding door. 
 

The green accents in the kitchen really play off the green walls in the adjacent dining room.


We swapped out the fridge the previous owner had just purchased. Lowe's basically took that fridge back and gave us full credit, which we applied to this counter-depth side by side. I felt it was important that the fridge not stick out into the space (which was already a bit narrow).


We moved the table off to the side for easy access to the back door.


All the little touches are what make me so happy. This pear lived in my grandmother's kitchen and was filled with sugar. I never met her, but I think I got some of her cooking/baking genes.


The pulls on the drawers took a lot of mental effort (long story). So happy with how they turned out.


I like having something "alive" in most of our rooms. This little "money tree" plant came from IKEA. The cool glass milk bottle came from TJ Maxx Home Goods.


I think I mentioned this in the last post, but we had the wood taken out of these upper cabinet doors and I picked a seeded glass insert. We keep all our white dishes, servings bowls and special "good luck" mason jar (used at our wedding) in here.  


A view of the entire room as we live with it daily. What a happy space!
 

And because you know I love side by side comparisions, here you go.

This room took priority when we first moved in. I spend so much time in the kitchen between cooking dinner nearly every night (yes I really do that) and making special treats. We also love to entertain and people ALWAYS congregate in the kitchen. I wanted the space to reflect us: inviting, comforting, bright, cheerful. I think it accomplishes that. So we consider it finished...for now. 

~Karli  

Friday, February 22, 2013

Karli's Kitchen Makeover: Part Two

Here's part two of my kitchen update. I thought the last post showed a drastic change, but this one is a very close second. 

So we left off with white paint on the cabinets. It was already such a happier, brighter place to cook. I spend so much of my time in the kitchen, I really wanted to love this space (but not break the bank in the process.)

Just a reminder of where we left off after painting the cabinets.
At this point we didn't have a backsplash on the wall behind the stove--probably the place where I make the biggest mess (hello spaghetti sauce and cake batter splatter).
Painted cabinets, but we were still living with old counters and one missing next to the fridge--a result of my super measuring skills.
At this point, we hired a contractor for new countertops, backsplash and installation of a new sink and faucet. I knew I wanted a fairly neutral slab that would work with stainless appliances, white cabinets, gray walls and the future darker hardwood floors we'll have (these might be in the plan for 2013--fingers crossed). So off to the granite yard we went... 
Brent was holding up a white cabinet door and a darker clipboard to represent the future hardwood floors. We wanted to check out how the slabs looked with those components.

At this point I'd also decided I wanted to do a classic white subway tile backsplash. For many of the same reasons I chose white cabinets, we chose a crisp white backsplash and white grout. My goal was to bring light to the space!

At the same time, I ordered my dream sink and faucet. I HATE (cannot stress this enough) trying to wash large pans in a double sink. So my answer was one giant sink basin in classic white cast-iron. Nearly every day I say to Brent while washing dishes, "I will never regret spending the extra money on this sink. Look at me...I can run this entire cookie sheet under the water!"

After the counters had been templated, cut and were ready for installation, the crew came and took out the old, ugly stuff. I did a happy dance! 

Old counters GONE!
They made fast work of getting the countertops installed and putting my new sink in. That faucet is pretty awesome too. The spray nozzle can toggle on and off and just slides right out of the neck.
This makes me so happy!
The next day the tile guys showed up and started the subway tile backsplash. It was tedious work and they had to make several trips to the house: mortar dry time, grout and finally a seal on the whole thing. 
 
Woohoo! What a difference with the counters, backsplash and white sink too! At this point we still needed the grout/seal and electrical covers.

 
Just look at how much brighter it is. I love the way the light bounces off the subway tiles.

I think I may have forgotten to mention in this whole process--that ugly light over the former owner's dining table was one of the first things to go. Before we had our table there, I can't tell you how many people nearly ran into it.  

I'm working on a final post so you can see the real finished kitchen. (Maybe soon I can post more with the wood floors too).

~Karli