
Santa's elves....that means me and hubby......got to work. I did a little drawing and planning and digging around out in the shop. I came up with the perfect rusty old hinges and two rusty coat hooks. I knew they would be perfect to make the Restoration Hardware knock-off shelf!
I have a limited supply of old barnwood, but I didn't have any good pieces as long as I needed for this project so off to the lumber yard. I had to buy a new 1"x12" piece of pine. We cut the board into two pieces, one 34" long and one 40" long. We trimmed the 40" piece to measure 8 1/2" wide and left the other piece full width, 11 1/2".
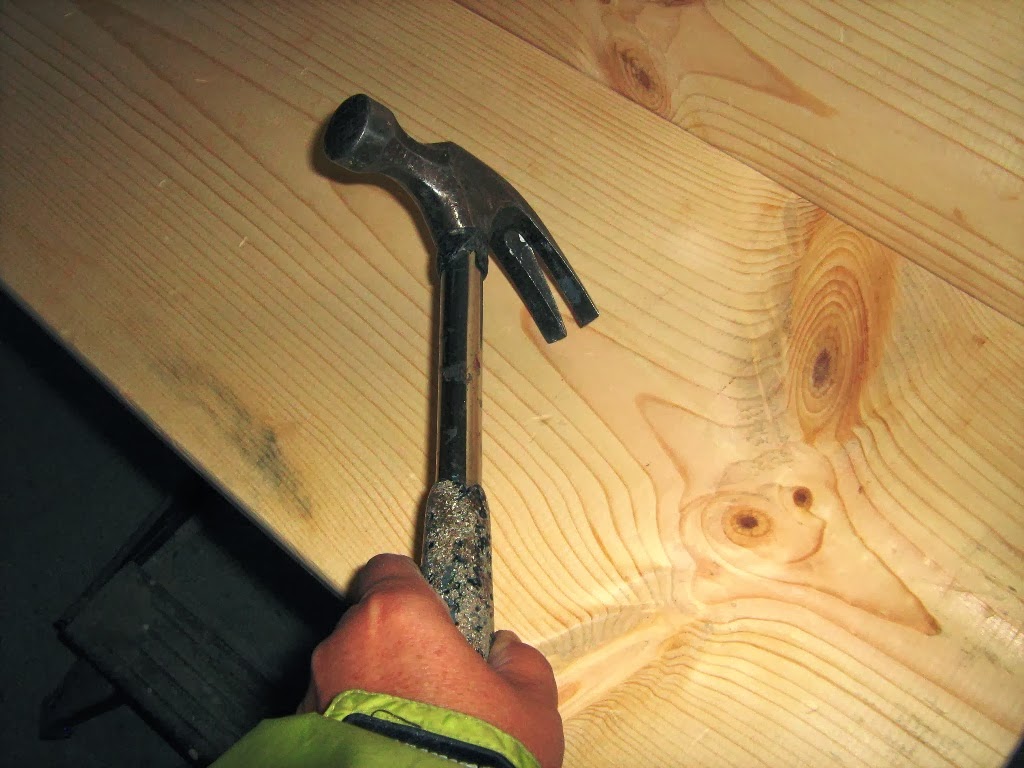
New pine boards need a little "help" to look old and weathered. I beat on them with a variety of tools....whatever is handy will work.
We predrilled and then screwed the top to the bottom.

We decided exactly where we wanted the hinges to be, marked and drilled the holes for the screws. Two of the screws will be longer, allowing the shelf to be screwed to the wall. We put it all together then took the hinges and hooks off so I could paint and distress the shelf.


I then did a paint process and a dry brush technique with leftover paint from my bedroom (flat finish gray) and a combination of acrylic craft paint (brown and black).

I used an angle brush, with only a little bit of paint on the brush. I brushed in stripes, letting in feather out as I brushed the length of the board. You don't want a glob of paint in one area. You just keeping adding colors, blending until you like the looks of your work.


After the paint was dry to the touch, I sanded it with a sanding sponge and then applied a coat of stain with a sponge brush. I let it soak in for a few minutes, then wiped it off with a soft cloth.


After applying another coat of stain and wiping it again, I let it dry overnight.
Then a coat of clear Briwax, put the rusty old hinges and coat hooks back on and it's good to go................Imitation Restoration Hardware DIY Shelf.


Santa's Elves got done with time to spare.
Kandy
Linked up to Jennifer Rizzo's Fabulously Creative Fridays!
No comments:
Post a Comment