Showing posts with label arrangement. Show all posts

Friday, October 25, 2013

Fall Porch Decorations

I'm really happy with how my front porch turned out this fall. It's my favorite season, so this is the perfect way to celebrate! Mom's post about the fall decor in her house inspired me to finally get this done...better late than never, right?!

I bought two real pumpkins and two fake black pumpkins from Target.
 
I also purchased two orange mums from the garden center down the street. I replaced the pink geraniums that had been in those black planters all summer.
I LOVE the chalkboard panel. I'm happy with how my chalk art turned out. Who knows what it will be come Christmas?!

I simply painted a piece of shelving. You can buy a piece for about $1 from Home Depot if you don't have any scrapes.
These little lanterns came from Ikea. Eventually I'll load them up with pine cones for Christmas!
And the mums!! I love orange mums this time of year!
I hope you're enjoying the fall weather.
~Karli

Sunday, September 15, 2013

The McOlson House: Design Boards

Yesterday was a fun day! Karli delivered Marie and Travis the design boards we put together for their main living areas. This included the front room/dining room, the kitchen space and the family room. Below you can see each room's design board with notes for the two fo them as they start to execute the plan.

While Karli was there, the placement of the furniture in the front room was adjusted and Marie sent me a message today saying that she's going to buy the paint right now.

Here's the front room design. The walls will be SW Accessible Beige and the ceilings will be white.

Marie's front room


A view of the room
 
The front room and dining room are open to one another, so they all need to be the same paint color. We also wanted to repeat the mustard/yellow accent by painting their side board and then hang that "inspiration piece" above. You will see that piece right as you walk in the house, so all the accent colors have been chosen to play off that.

The dining room view
 
 
Marie's Dining Room


Next up is the kitchen. They shared the floors they've chosen for the entry, kitchen and family room and we must have guessed correctly, because something very similar is represented below. We talked about painting their island SW Tricorn Black as shown below. Then potentially dropping three pendants. The eat-in kitchen will get a new light too. This whole space and the adjacent family room will be SW Functional Gray.

Kitchen view

Marie's kitchen


And finally, the room that presented the more challenging aspects of the entire project. The room is large and expansive. It also has a large wall that is calling for some art. The location of the TV required some creative thinking.
Family room view


So we've proposed two large square canvases hung vertically above the black console to draw the eye up. We also suggested adding a small bookcase under the TV, near to the stair railing to "ground" the TV. It should be painted the same color as the walls for balance.

We left lots of options for patterened curtains and rugs. We wanted them to be able to choose their favorite within their budget and timeframe. Their existing furniture will work in the room (rearraged ever so slightly) with potential additions of a chair (in an accent color like teal) and some transitional seating like poufs or cubes.

We also suggested that they paint the inset where the clock hangs over the fireplace a green. It will balance the two green canvases hung on the adjacent wall.  

Marie's family room


We really enjoyed putting these boards together and can't wait to see how it all comes together.

Kandy and Karli

Saturday, September 7, 2013

The McOlson House: Making It Their Own

Meet Marie.

I was honored to have Marie as a beautiful bridesmaid during my wedding

I met her our freshman year of college. We were on the same floor in the dorms and soon decided we'd like to share off-campus housing once we were allowed to move out. We lived together for two years, in a tiny apartment and a rented single family house, so I had a pretty good idea about her style. She's one of those friends that you can pick right back up with, even if it's been months since you last talked.   

Marie and her husband Travis recently bought a house. She asked me to come over and give them some ideas on paint colors, layout, finishing touches, etc. I jumped at the chance! I spent a morning with the two of them, talking about pieces of furniture they had to keep, what we could change, what they like and don't like. Then I took pictures and measurements and started planning with mom. We did a lot of our brainstorming via a secret board on Pinterest. (Have you tried that? It's amazing!)

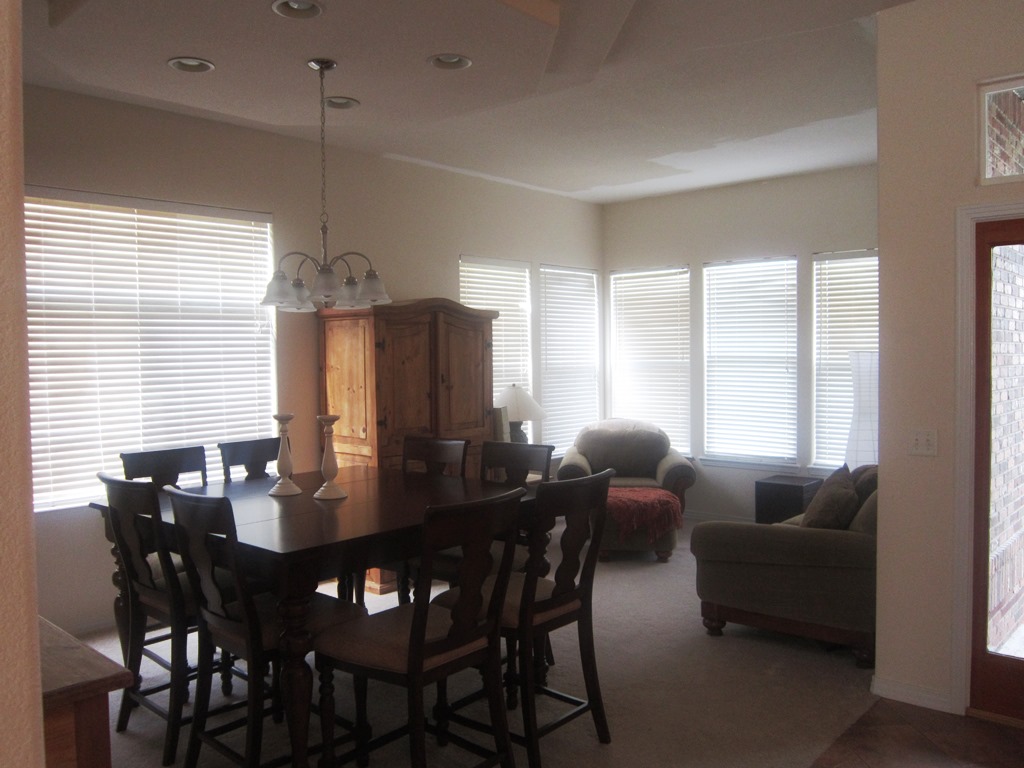
So here are the before photos of the space. Their biggest concern was the paint. The pale yellow is so not them. They want to add color, but aren't sure where or how much. So my goal is to add punches of color within a neutral palate.

As you walk in the front door, this room is on your right. It's a dining room/formal sitting room. You can see that they started to paint the ceiling white, but it made the yellow-ish paint look worse. So right now that's on hold until we pick a paint color.
 
This is the couch (with a matching chair) in the front room. We'll work with this, just switching up the placement and pillows.
 
This is the dining room view. The table is cocktail height. The light fixture is change-able as well.
 
The next room you walk into is the open, spacious kitchen. The granite color is great. They don't love the tile floor or backsplash, so I'll come up with some ideas for that as well.
 
From the kitchen you can see into the family room, where they spend the majority of their time. We'll work with all the furniture in here. Paint, window treatments and some punches of color will finish this off nicely.
 
This is a piece of art Marie recently bought. I am actually using it as my inspiration for the pops of color I'll use in the entire space. I'm thinking of hanging it on a wall you see right when you walk in--a point of view where you can see all the rooms. It will all make sense from that vantage point.
 

Mom and I were putting finishing touches on our design boards this weekend. I'll present them to Marie and Travis and get their feedback so we can make any adjustments before they're considered final.

This is SO fun!

Stay tuned for more,
Karli

Friday, June 28, 2013

Quick Change Artist: Master Bedroom Refresh

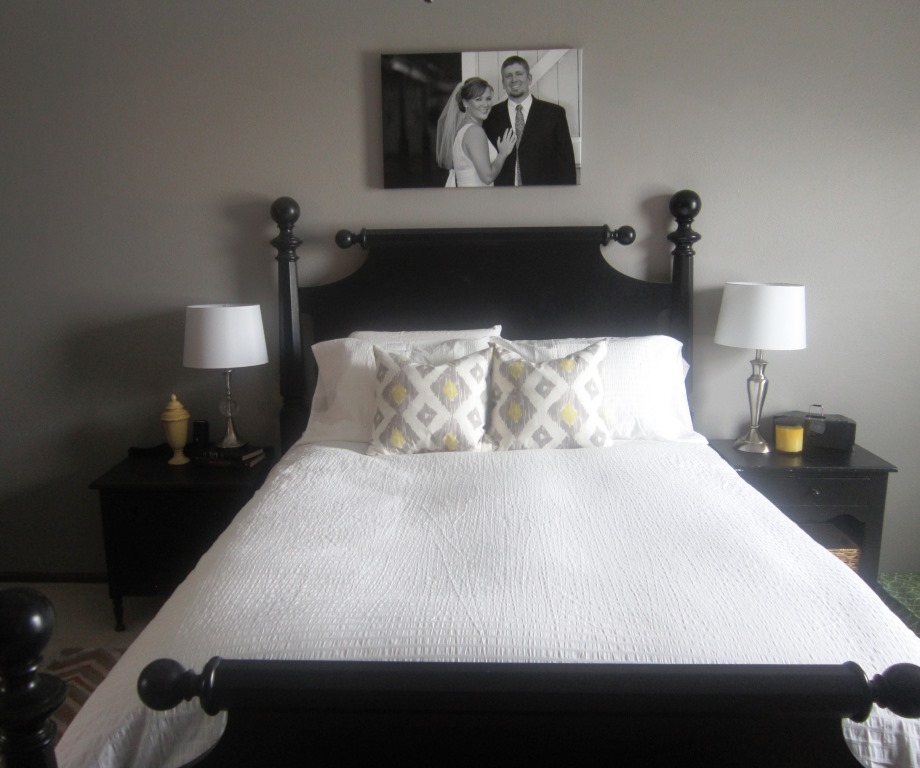
Our house has a lot of gray, black, white and green. Brent has voiced this to me on several occasions. So after giving it some thought, I realized one of the easiest rooms to update would be our master bedroom. It had green pillows and a green candle. That's really all the green. Here's a glimpse of what it looked like.
Two green pillows and a black and white damask pillow.
 
I've been thinking about adding more white to the bedding.
 
Even Porter's bed is green. (Cutest doggie ever, right?!)
 
The wall opposite the bed. I happen to really love this arrangement.
In an ideal world, we'd have a nice sitting chair over in that corner with a side table and a floor lamp. And you probably can't tell from the pic above but there is a painting hanging in the mix that I've always loved. I bought it from an artist outside the Guggenheim about five years ago. So it became my inspiration.
What do you see in the painting? I see a street view of a New York with a taxi on the left.
I had a glorious Friday off and I headed to TJ Maxx for some stress relief. I hit the jackpot in the clothing department (scored black shorts and two versatile tanks) and the home goods (pillows, a basket and a white ceramic garden stool I've been hunting for a year!)

I got these two pillows as a starting point. Love that they pull in the yellow from the painting.
 

I had the rug in the guest room and pulled it in for fun. I think I like it!
 
Also found a yellow candle that smells like apricots (yum!) and the basket that fits perfectly in Brent's night stand.
I think I can amp up the yellow just a little bit more, so I'll be on the search for a new throw for the bench/bottom of the bed.
I remembered that I had two shams that came with the duvet cover so I put two extra pillows in them.
 
I also found that cool ceramic white light that I added to the dresser.
I'm loving the results for only about $45! Thank you, TJ Maxx!

~Karli

Friday, May 24, 2013

Displaying Found Junk On A Patio Wall

You may remember in an earlier post the damage that was done to the roof of our garden shed when Dwight and I took down part of an aspen tree......well the weather has now improved so we decided to repair the damage that we caused.  We replaced a board and the roof shingles.  Fixing all of that meant that we needed to get to the inside walls of the shed, locating nails.  Needless to say, we found it necessary to empty the shed to get to those walls.

As we sorted through 30 years of stuff, I found some "junk" I had forgotten that I had.
It is all "family stuff" that I had hauled back from Oklahoma, knowing some day I would find a place for it.  Here is the saved stuff we uncovered in the shed.....

These are old cistern cups, used to bring water up out of a cistern or well. These were my Grandpa Ray's and had been used on the farm in Okla.
 
A rusty old saw blade and a gear.
                                     
These are a pair of rusty old hames, part of a harness which would have been used with horse drawn farm implements. These were Grandpa's too.
           
This is an old drawer front I found who knows where....... You can not see it but it has the letter "F" stamped on the front.
It will be great to hang BBQ stuff off of the handles, or not!!!

I hung all of this assorted "found junk" on the wall outside on the deck.  I already had the grapevine wreath hanging there, so I just incorporated it all for a unique display.
I bet I can truly say that no one else has a wall quite like ours!
           
I would love to add a pillow to the chair, but the squirrels have been known to destroy things on our deck.  I also need to re-stain the deck later when it gets a little warmer, but decorating this wall inspired me to look forward to spending time out here this summer. 

I want to try planting in the cistern cups, too......I think they would be great for succulent plants, like hens and chicks.  I have one more set of these that I'm saving for Karli.....she might want to do the same thing.  If nothing else, they are great conversation pieces!  Did you know what they were?

Happy Deck Time, Kandy

Wednesday, March 13, 2013

Empty Frames for a Blank Wall

I'm dedicating this post to a series on a blog I love..."Working with what you have" on EmilyClark.com. I'm participating in her link up party today!

The hallway from the front of our house to the back is (was) boring. The door to the powder bath, the thermostat, the doorbell speaker, light switches and a weird angled wall (due to the stairs).

The before...
I had in my mind that I wanted to put something interesting here, but it couldn't be anything too deep since the hall isn't that wide. So I gathered up some empty wood frames last time I was at my parents, brought them home and painted them white. And there they sat in my garage for like two months.

While Mom and Dad were here a couple weekends ago (cutting down a tree...post coming soon) we finally got to those frames and the hall.

First step: lay the intended items out on the floor to figure out an arrangement that looks good.
Step two: take a quick pic of the arrangement so you don't forget.

Side note...I can't wait for new floors
Step three: Hang them up.
Step four: Stand back and admire the new look.

From this angle you can really see all the stuff(doors, stairs, etc.) in this hallway.

Little different angle...

And finally, the view from the front door. You can also get a small glimpse of the fabulous new closet door.
 I'm really happy with it. It doesn't feel too heavy (since its a little dark there I couldn't add anything too dark) and it doesn't infringe upon the walking space. Someday I'll add some quirky letters or some additional empty frames like our floor example shows.

Another little project done (for now).

~Karli