So, we bought several yards of the natural color burlap and then I checked out different blogs and sites for flower making advice. I found some wonderful ideas and instructions, but after trying several methods, I ended up doing my own thing!
Let's get started making "Kandy's Burlap Flowers":
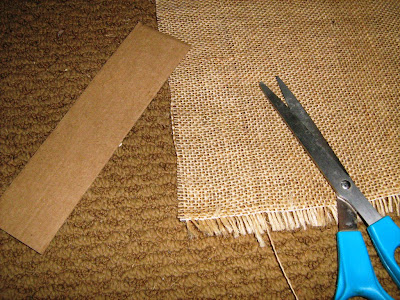
Here is what you will need: burlap, scissors, sewing machine, glue gun, cardboard circles (cut 2" diameter for small or 2 3/4" diameter for large), an old magazine (for gluing on top of...tear off page when gets messy), the lid of a spray paint can (works well to glue on, turns easily), clothespin (and anything else you see in the photos that I failed to mention).
Here are the steps:
1. Cut fabric into strips 2" wide 44" long (the width of the fabric).
Tip: Pull a thread just beyond 2", then cut along this line. This helps your fabric stay square and straight.
2. Cut this strip in half (22") for a small flower or leave the full 44" length for a large flower.
Tip: Use a clothespin to hold it in place while it dries. This end will become the center of your flower
Tip: Pick a thread above your line of stitching. Don't pull it completely out. Your clothespin and glued end should hold it.
6. While keeping tension on that thread and keeping your fabric ruffled up, fold the remaining end under and glue it.
Tip: This is going to become the bottom of your flower.
7. Now glue that edge onto the outside edge of your cardboard circle. Your cardboard circle should be sitting on your spray paint can lid. You can take the clothespin off of the other end. It should be secure by now.
8. Continue gluing that ruffle onto the circle, turning as you go, working your way inside your flower. (Be careful not to burn yourself.) You can cut off the end of the thread that you gathered with. You may also need to trim some threads as you work...burlap frays out easily.
9. Continue gluing, forming the center of the flower with the very end of the fabric. This should look somewhat like a flower by now.
10. Carefully hold the very center for a while till the glue has all set up.
If all went well, you should have a flower that looks like this or similar!
If this hasn't been enough steps for you, we can keep going.....
You can cut a circle of burlap, the same size as your cardboard and cover the underneath side of your flower (just so it looks nice on the bottom).
You can also glue on a magnet or whatever else your little heart desires (like a clothespin or brooch pin or hairclip), depending on what you plan to do with "your" flower.
Karli and I are using our flowers on napkin rings and for table decor. We'll be sure to take pictures and make a post about our tea table. I bet you can hardly wait to see it!!!
Later, Kandy


